How to Downgrade Dell PC from Windows 8 to Windows 7
“I just don't like some of the changes made in Windows 8 and some of the games/programs I use aren't usable anymore. I got a Dell computer pre-installed with Windows 8 last week and I know that Microsoft released rights to downgrade Dell from Windows 8 to Windows 7 Pro. I just don’t know how. Someone please help me? >_<”
-from Dell Community
When Microsoft rolled out Windows 8 operating system, it encouraged users to upgrade from Windows 7 to Windows 8. However, some impulsive users are not adapted to the new system and would like to downgrade from Windows 8 to Windows 7. How to do that? In this article, we will give detailed guide on downgrading Windows 8 to Windows 7 for Dell Inspiron/Alienware/Chromebook/XPS series desktop, laptop or 2-in-1 PCs.
If Dell Computer doesn’t have a previous version of Windows 7, then maybe it is a brand new Dell computer that is pre-installed with Windows 8. In that case, you have to reinstall Windows 7 to Windows 8 computer. Follow the steps as below.
Step 1. Create Windows 8 Pro Recovery Media
Step 2. Download Windows 7 Pro Drivers and Copy to USB Key
Step 3. Change Windows 7 Installation System Setup Settings
Step 4. Install Windows 7 Professional
Step 1. Create Windows 8 Pro Recovery Media
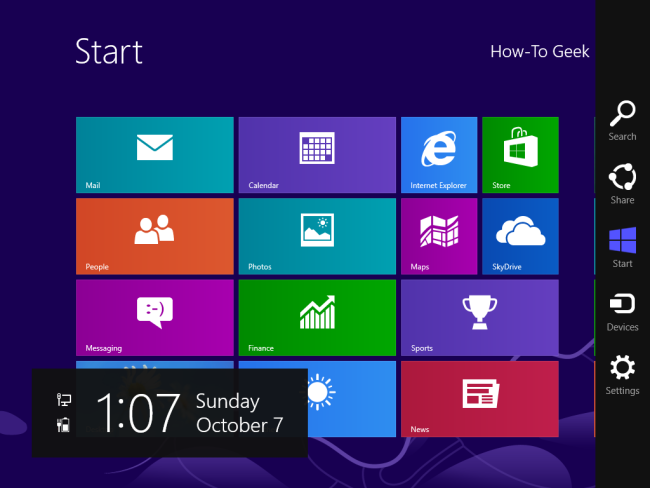
- At the Windows 8 Start screen, press “Windows+ C” to open your Charms bar.
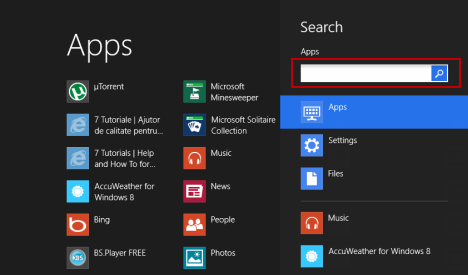
- Then in the “Search” charm, under “Apps”, type “Backup” and select “Dell Backup and Recovery”.
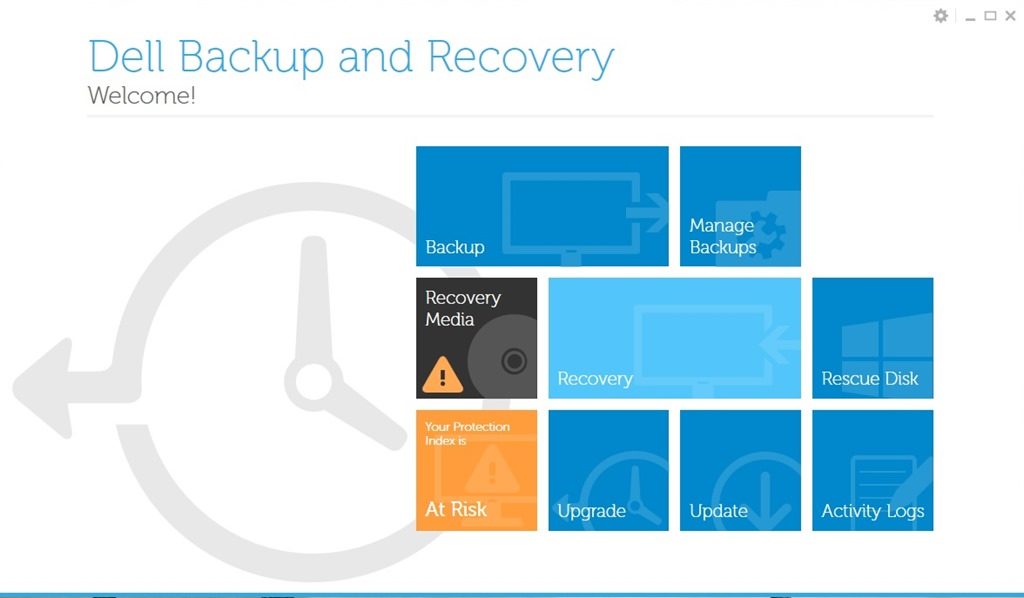
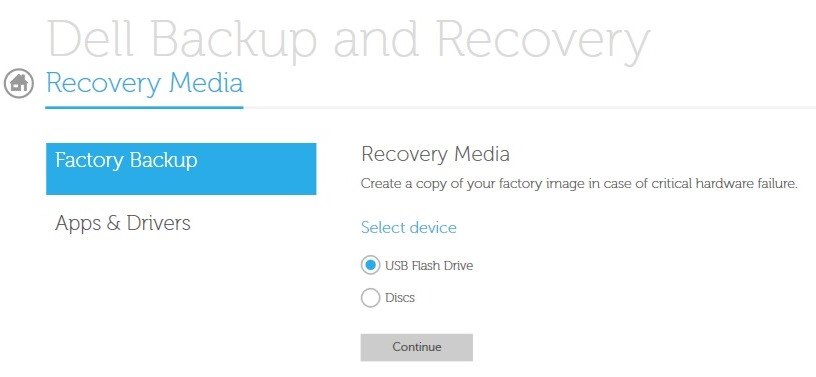
- Now you can see “Dell Backup and Recovery” main interface, select your preferred option. Then choose “Recovery Media”.
- Then you should choose the type of media you would like to create your Windows 8 Pro backup, either USB Flash Drive or Discs.
- Insert a USB key or DVD disk to the computer. “Dell Backup and Recovery” will identify the drive. You will see a green checkbox if the media is suitable for the recovery media.
- Choose drive and then select “Start”, then choose “Yes” at the bottom of the screen.
- The software will set up recovery media. You are likely to change discs for some times if you are using DVD backup.
- Once the recovery media is created, click OK to exit “Dell Backup and Recovery”.
Step 2. Download Windows 7 Pro Drivers and Copy to USB Key
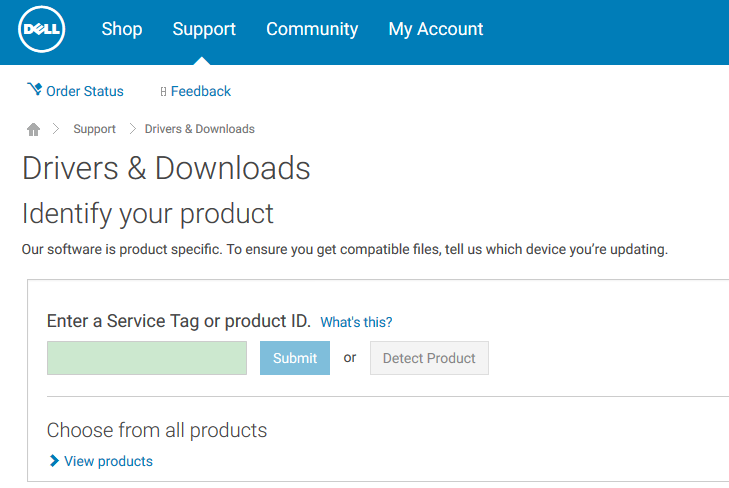
Visit Dell Drivers and Downloads webpage to download critical driver packages. Once the driver files are downloaded, run the exe file. Ensure to choose the USB key as the destination for the files.
Step 3. Change Windows 7 Installation System Setup Settings
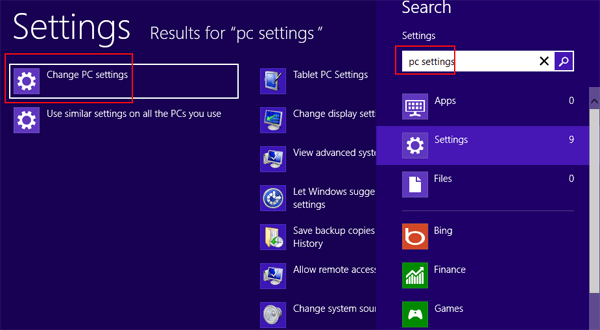
Press Win+C to show the Windows 8 Charms menu. Search for “pc settings” and then to access” Change PC Settings”.
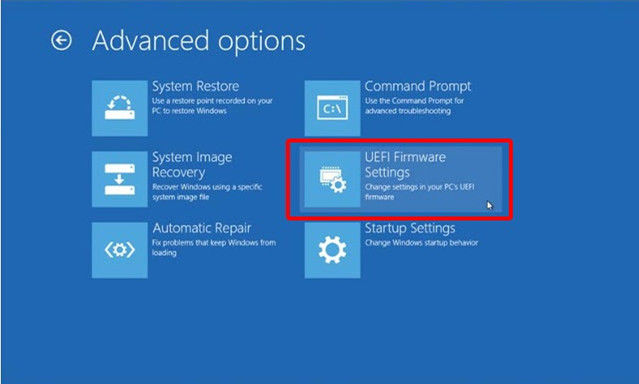
In the General tab, under “Advanced Startup” section, choose “Restart Now”. When the computer restarts, it will enter an advanced options menu. Then you should select “Troubleshoot” > “UEFI Firmware Settings” > “Restart”, then it will enter “System Setup”.
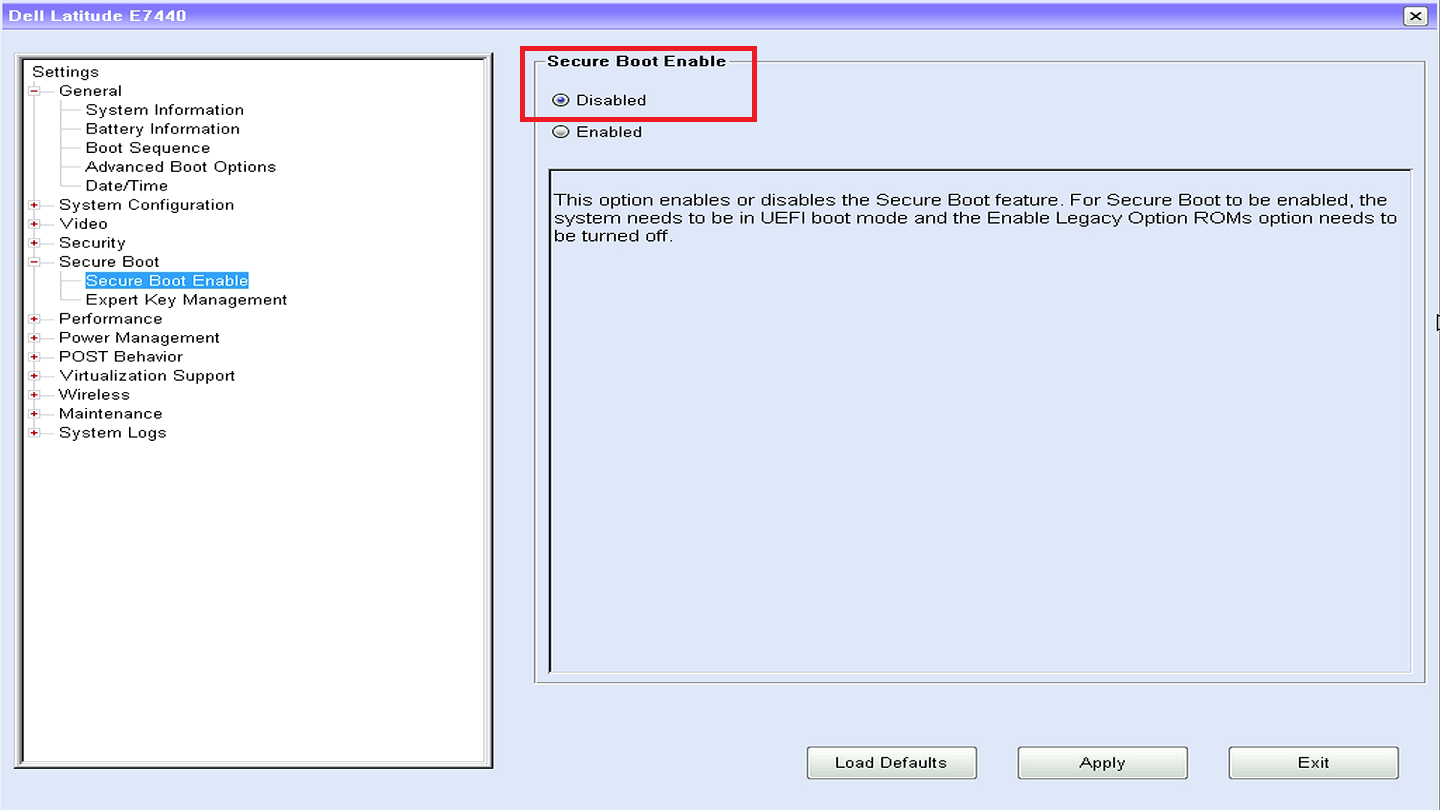
Dell computer is about to reboot again. At this time, it will access System BIOS. In the System BIOS setting, click “Secure Boot”, make sure the “Secure Boot Enable” is Disabled.
Click “General” and then tap on “Boot Sequence”, in the “Boot List Option”, pitch on “LEGACY”.
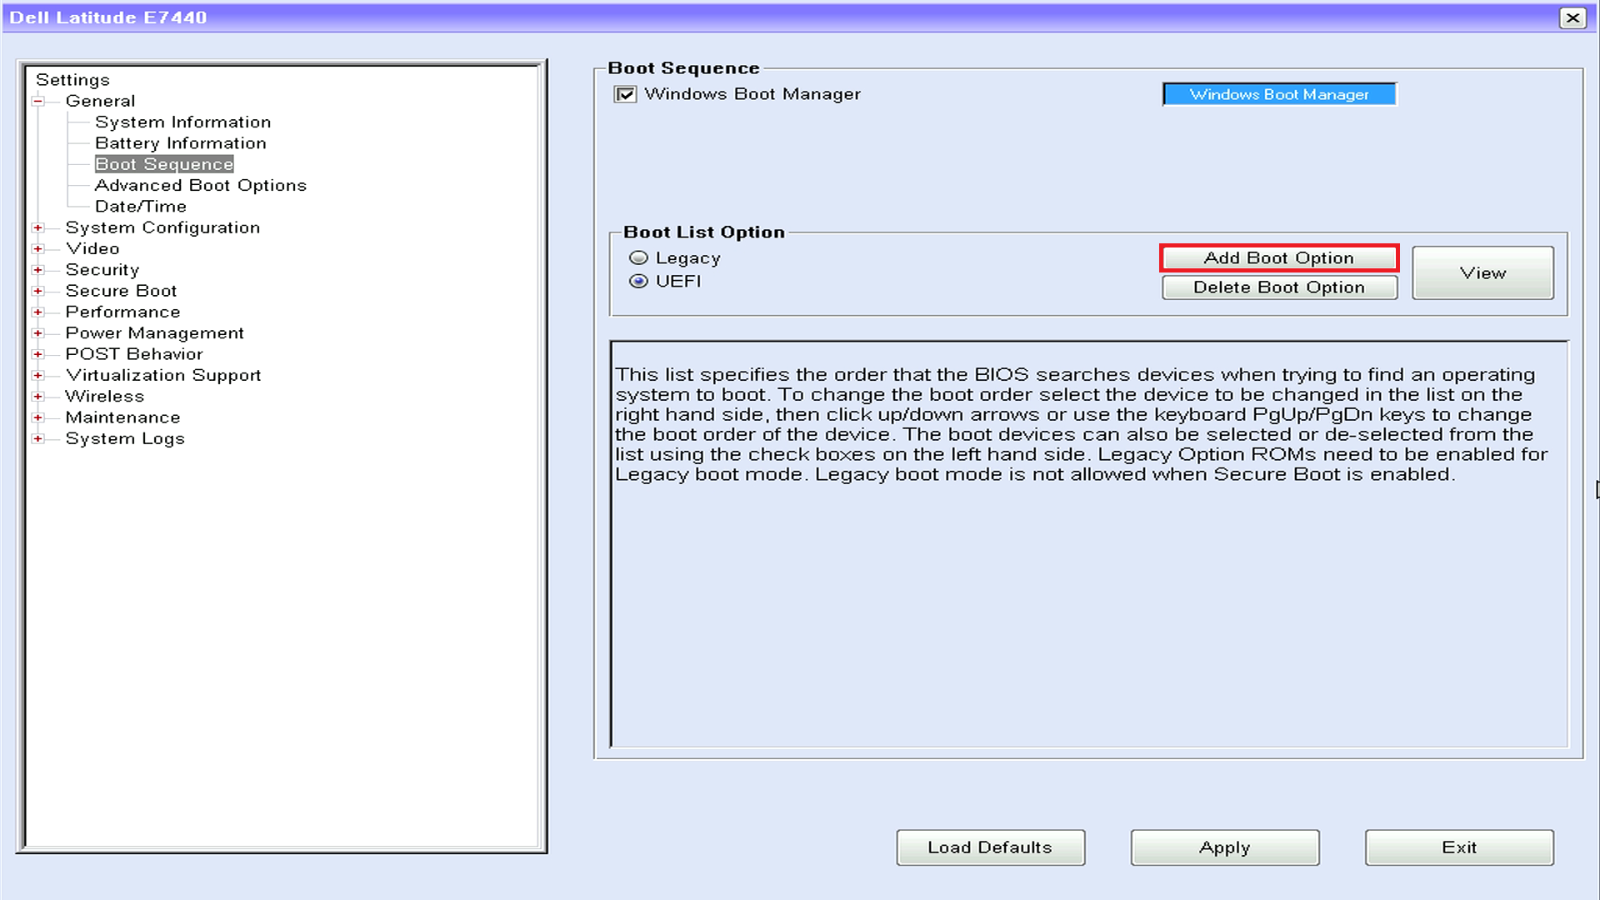
Some computer systems have an advanced boot option “Legacy Option ROMs”, you should enable it. After that, hit “Apply” and OK to apply the changes. Finally, exit BIOS.

Step 4. Install Windows 7 Professional
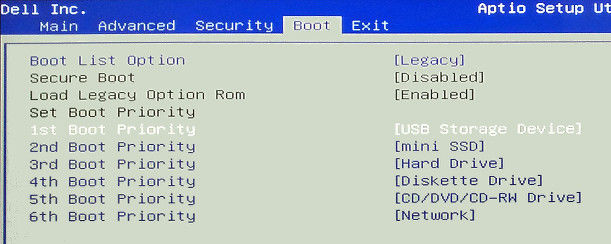
Insert Windows 7 USB key to an available USB port and reboot Dell computer. Press F12 before Dell logo appears, then you have entered system BIOS, just set up the computer to boot from USB Flash Drive and press Enter key.
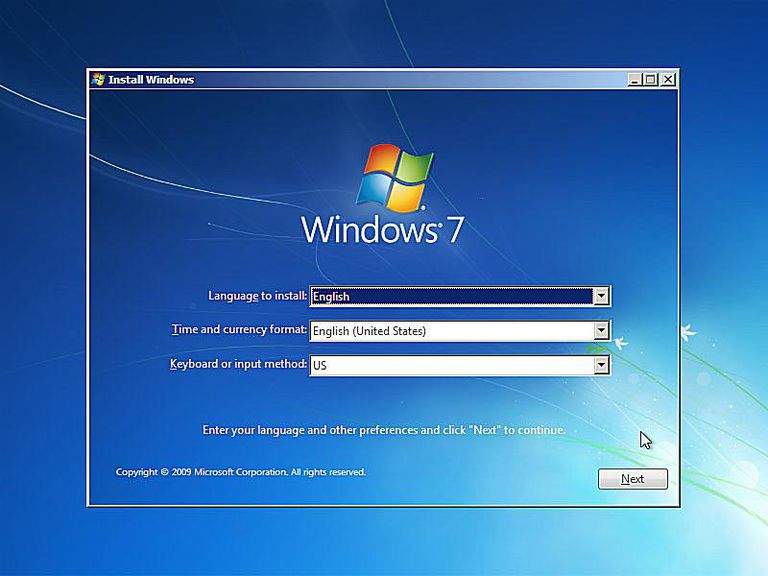
After Windows 7 Setup loads, choose the appropriate Language, Time, Currency and Keyboard Method settings and then tap on “Next”.
Then click “Install Now” in the middle of the screen, under Windows 7 logo.
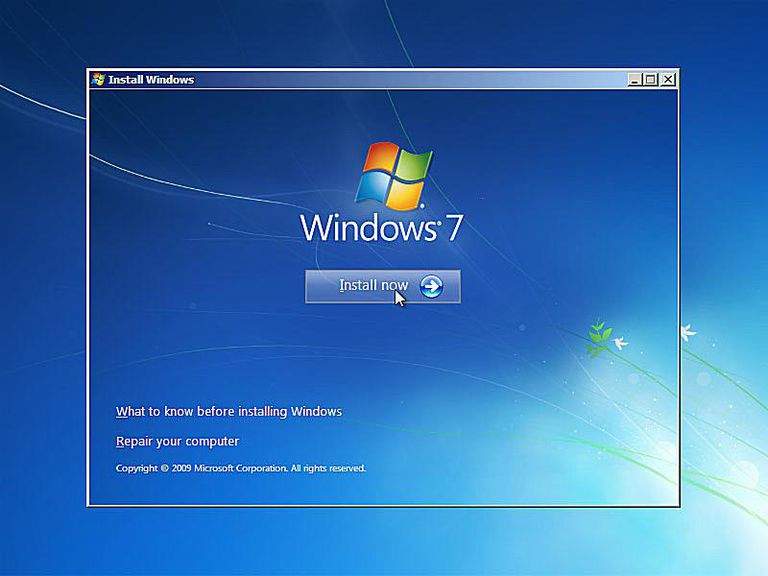
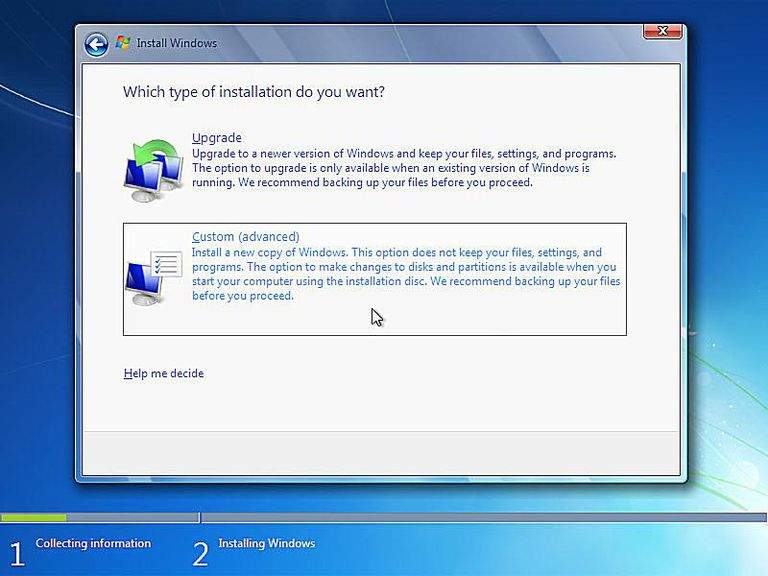
Continue and accept the license terms, and then click on “Next” again. Then it will ask which type of installation you want, just choose “Custom(advanced)” option.
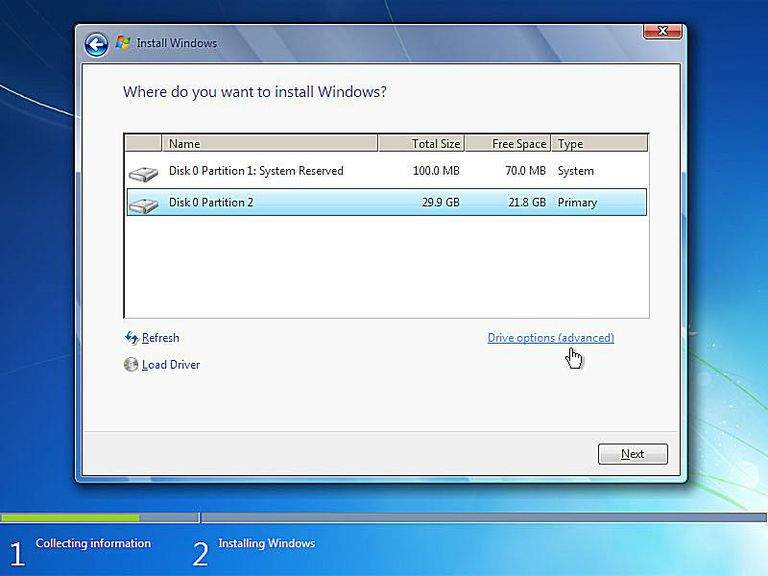
In the next screen, select “Drive options(advanced)”.
Now all the available drive options are displayed, you can delete any OS related partitions from your existing hard drive.
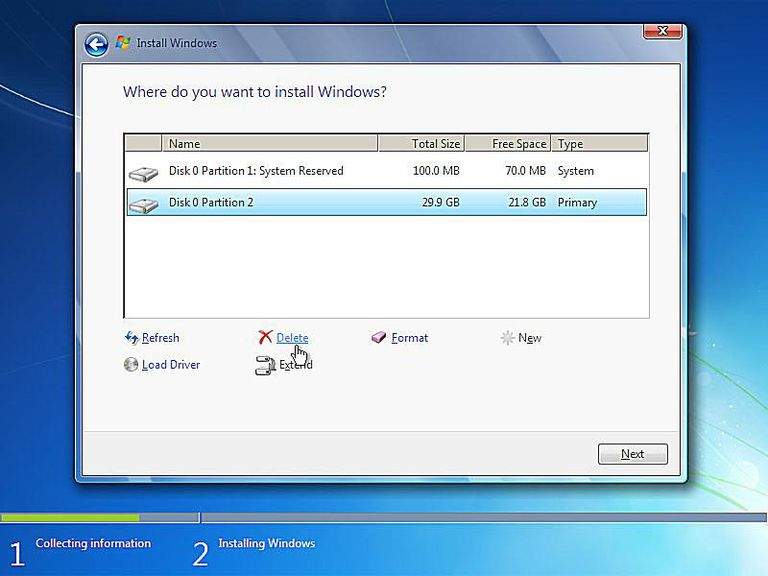
Now you need to choose a physical location to install Windows 7 Pro.
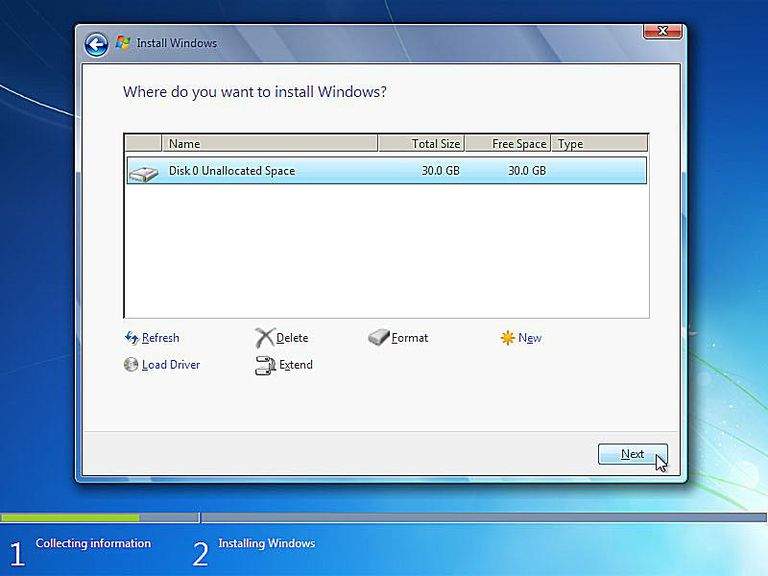
Now Windows 7 set up is coming.
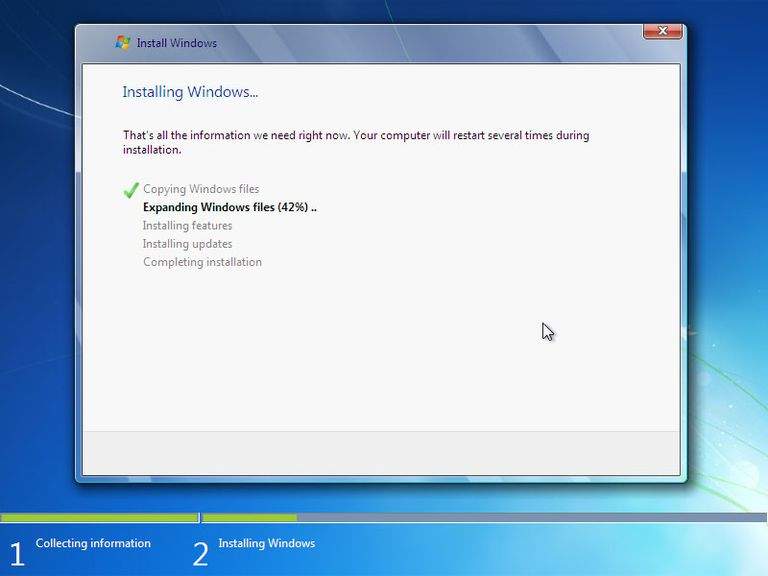
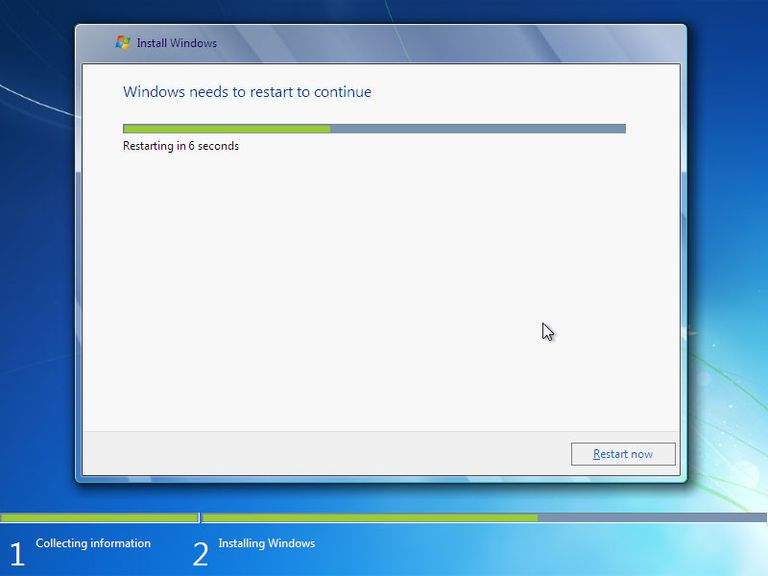
It will restart your Dell computer.
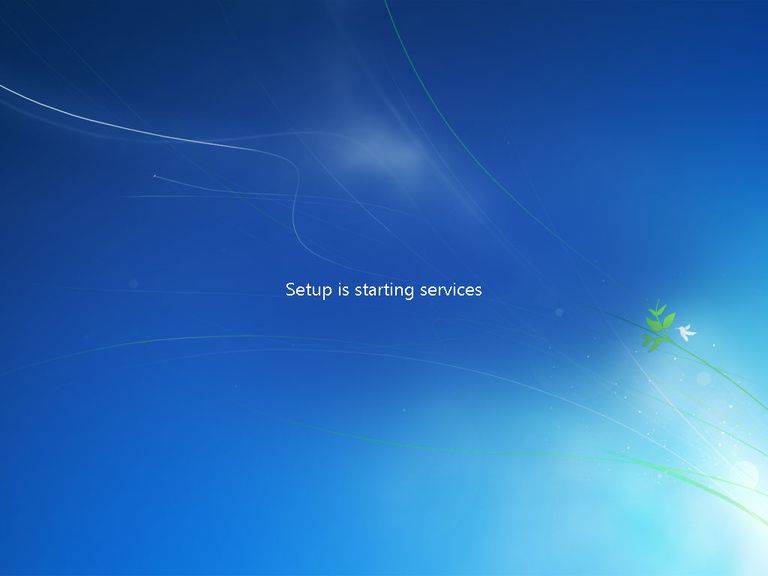
Wait for a moment, the setup is starting services.
Finally, you successfully downgrade Windows 8 to Windows 7. If the computer asks for typing product key to activate Windows, just purchase one from Microsoft official website.
Friendly Reminder:
If Dell Computer has a previous version of Windows 7, then how to downgrade upgraded Windows 8 to 7? Actually there are no downgrade rights between them, so you still have to follow the above steps to complete the downgrade.
By the way, if you want to downgrade Windows 10 to Windows 8.1/7, HERE is the tutorial guide. Last but not least, if you forgot or lost login password in Windows 10/8.1/8/7, Windows Password Key is the best Windows password recovery option.
Get Windows Password Key Now!
- Related Articles
- How to Reset Dell Windows Password
- Top 2 Ways to Unlock Dell Inspiron Laptop without Password
- How to Reset Dell Password on Windows 10 within Steps
comments powered by Disqus


