Top 3 Options to Fix Windows 10 Computer Lagging/Slow in 2017
"Hi, I have a problem where my Windows 10 computer is lagging whenever I open a newly installed or updated program/applications that are on another drive than my OS. Anyone that have had this problem or have an idea what I could do?"
-from Windows 10 Forum
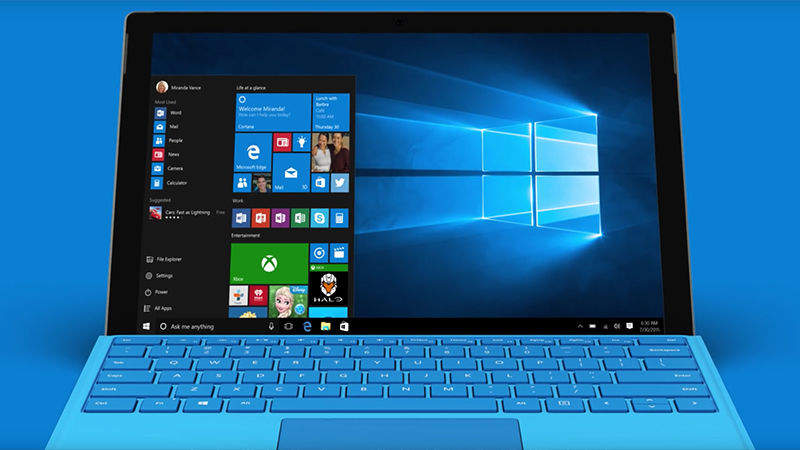
Even though your computer is running Windows 10 with the newest hardware, you might recognize that the operating system seems to slow down or lag at times. Some Windows 10 users may encounter such problem like Windows 10 slow after updating, computer lagging Windows 10 in 2017, etc. Don’t be so fuss! The content below has had good descriptions of fixing Windows 10 slow performance.
- Option 1: Improve Windows 10 Slow Performance with Control Panel
- Option 2: Fix Windows 10 Computer Lagging with Task Manager
- Option 3: Fix Windows 10 Slow Performance with Windows Care Genius
Option 1: Improve Windows 10 Slow Performance with Control Panel
If you’re suffering Windows 10 slow performance, try to reset the Initial Size and Maximum Size to the Recommended File Size in Control Panel, this may improve computer’s performance.
- 1. Open “Start” menu, find the “Control Panel” and then just tap it.
- 2. In the Control Panel, go to the “Search” filed at the top-right side of the window and then type “performance”. Now hit Enter.
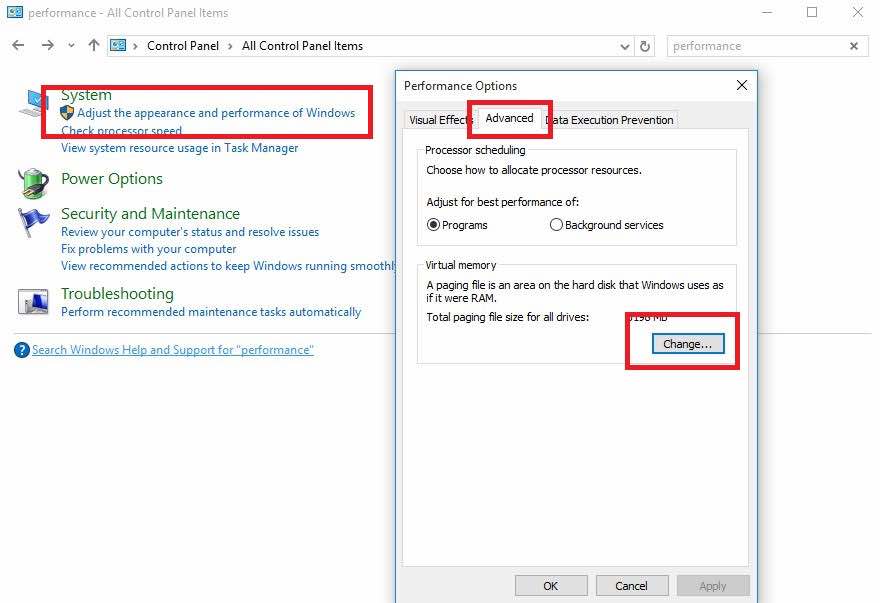
- 3. You will find “Adjust the appearance and performance of Windows”, just click it and then it will open “Performance Options”.
- 4. Just hit “Advanced” and then click on “Change…” button in the “Virtual memory” option.
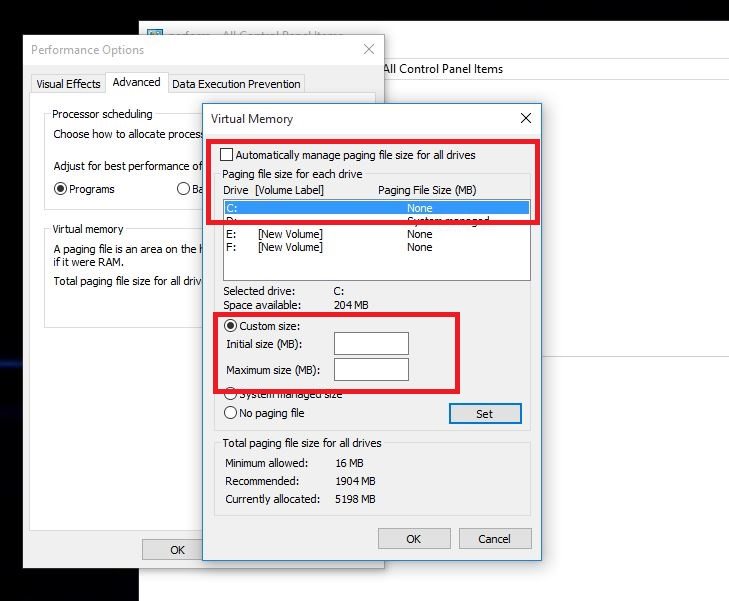
- 5. Uncheck the “Automatically manage paging file size for all drives”, select the C drive where Windows 10 is installed. Choose “Custom size” and change “Initial size” and “Maximum size” to the recommended values by Windows which is in the “Total paging file size for all drives” section. Different computer shows different file size.
Option 2: Fix Windows 10 Computer Lagging with Task Manager
One of the reasons that your computer become sluggish is that you’ve got too many applications that you never use or rarely use running in it. Consequently, try to close them and stop them effecting your PC.
- Open “Task Manager”. Press “Ctrl+Alt+Delete” at the same time and then choose “Task Manager” in the blue screen. If it shows no tabs, click “More details” at the bottom of it.
- Hit “Startup” menu. Find “Startup” menu in the main tabs and you will see all the applications that launch when you start Windows.
- Disable program. To disable the apps that you don’t want to run, just choose it and right click your mouse, tap “Disable” button.

Option 3: Fix Windows 10 Slow Performance with Windows Care Genius
As a professional program to optimize Windows system, Windows Care Genius has helped millions of Windows users to protect or rescue their PCs. With 5 main functions and several clicks, it enables all Windows-based computers to run in better performance.
Now let’s see the brief user guide as below:
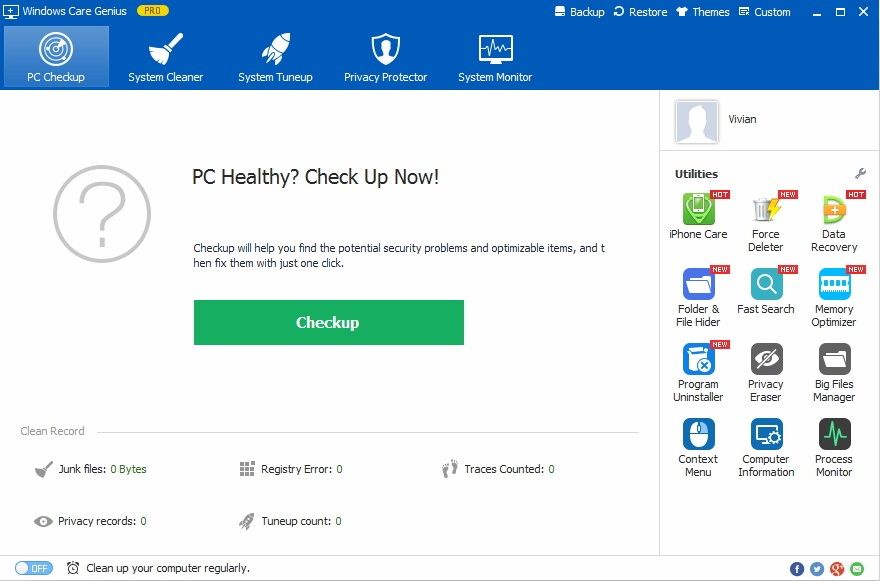
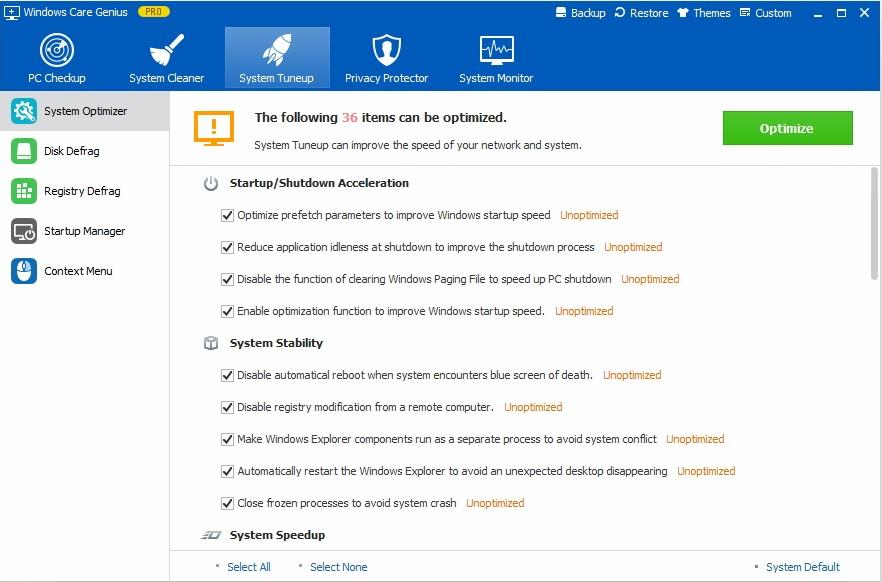
- Step 1. Download, install and launch Windows Care Genius to your slow Windows 10 computer. You will see the main interface as below.
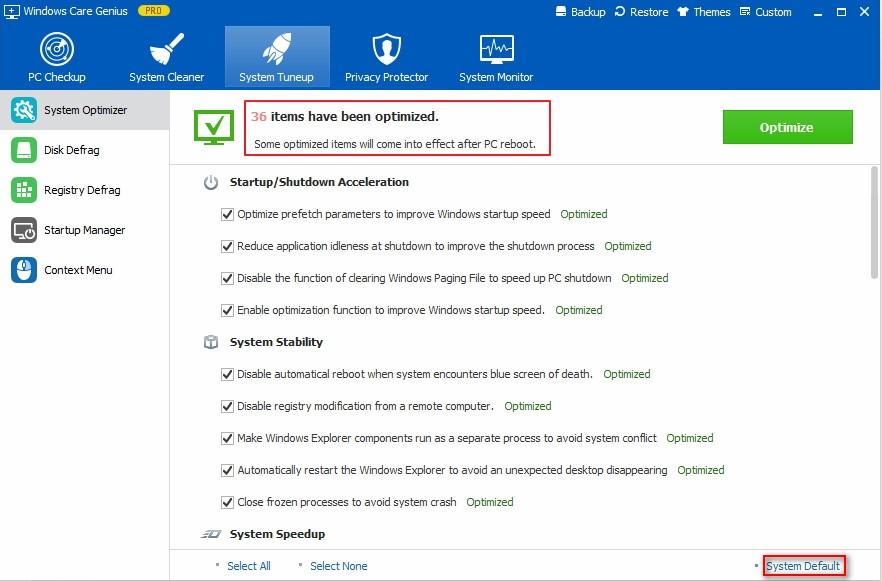
- Step 2. Tap “System Tuneup” option from the 5 functions and then you will see the sub menus, the default option “System Optimizer” is ready to use.
- Step 3. Click the green button “Optimize” and then begin to speed up Windows 10 performance instantly.
That’s all the information that I have collected to improve slow Windows 10 performance for you and you are able to check if it makes any difference. Hope that after trying the method in this article, you’ll find that you’ve got a faster Windows 10 PC and it is less likely to have any problems. Leave your feedback in the comments whether these methods show improvement for you or not.
Get Windows Care Genius Now!
- Related Articles
- The Easiest Way to Create Sony VAIO Recovery Disk
- How to Health Check Windows 10 for Best Performance
- How to Free Up RAM in Windows 10
comments powered by Disqus


