Top 2 Ways to Downgrade from Windows 10 to Windows 7 on Dell Computer
So there are two possibilities that your Dell computer is running Windows 10: free upgrade from previous Windows 7/8.1 for Microsoft’s push policy, or recently-manufactured with Windows 10 Professional preinstalled already. Whatever the situations you are in, if you prefer earlier Windows 7 and want to downgrade to Windows 7 on Dell Inspiron/XPS/Alienware or others, here we provide 2 ways uninstall Windows 10 and install Windows 7.
Way 1: Go back to Windows 7 from Windows 10 after 30 Days
Way 2: Downgrade Dell Computer from Preinstalled Windows 10 to Windows 7
Way 1: Go back to Windows 7 from Windows 10 after 30 Day
To extend Windows 10 user base numbers, Microsoft offers free upgrade for those using Windows 7 or Windows 8.1, but not everyone is satisfied with the flagship OS and a certain number of users want to downgrade Windows 10 back to Windows 7. The truth is that as long as you have upgraded for more than 1 month, you can remove Windows 10 and go back to previous build on your Dell computer. Here is what to do:
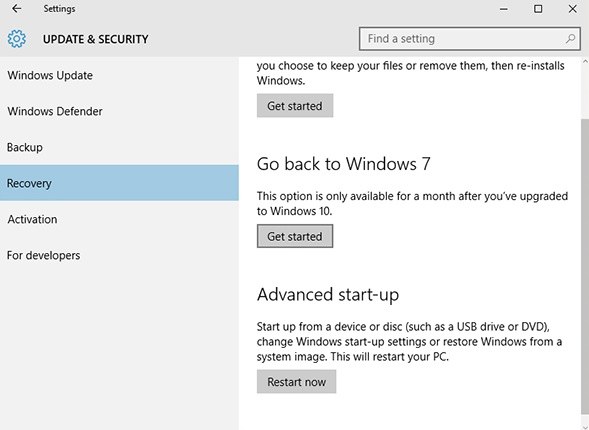
1.Open the Start menu and select Settings. Navigate to Update & Secruity > Recovery and select Go back to Windows 7 option there.
2.You will need to confirm a few things before restoring to previous Windows Installation on Dell computer: The reason why are you going back, a warning that you’ll lose any changes made after installing Windows 10 and some apps may need reinstalling, also a prompt that don’t forget Windows 7 password for next sign in.
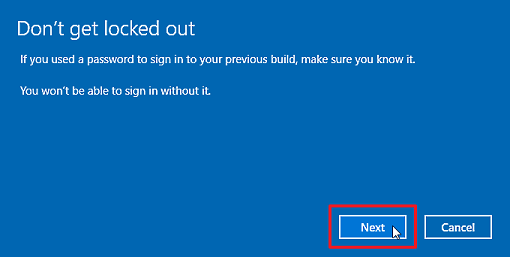
Tip: If you have accidently forgotten or lost Windows 7/8/10 password, or the computer doesn’t recognize your login password after downgrade, you can always use Windows Password key to reset or recover user account password. For detailed guide, please click here.
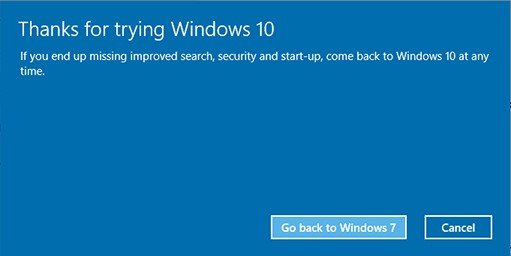
3.After all these, you can install Windows 7 after Windows 10 upgrade. The process should be finished within several minutes, but it also varies between Dell computers.
Way 2: Downgrade Dell Computer from Preinstalled Windows 10 to Windows 7
Not every Dell operating system are upgraded from Windows 7/8.1, some are shipped with factory-installed Windows 10 Professional edition. In this case, method 1 is not applicable. Before you downgrade pre installed Windows 10 to 7 on your Dell laptop, please note that system drivers available with Win 10 may not apply to Windows 7. Below steps will walk you through the whole downgrading process.
1.Prepare Windows 10 Pro Recovery Disk in Advance
Just in case you want to return to Windows 10 operating system later or system crashes after going back to Windows 7, it’s recommended to create a recovery media with a at least 16GB CD/DVD or USB drive
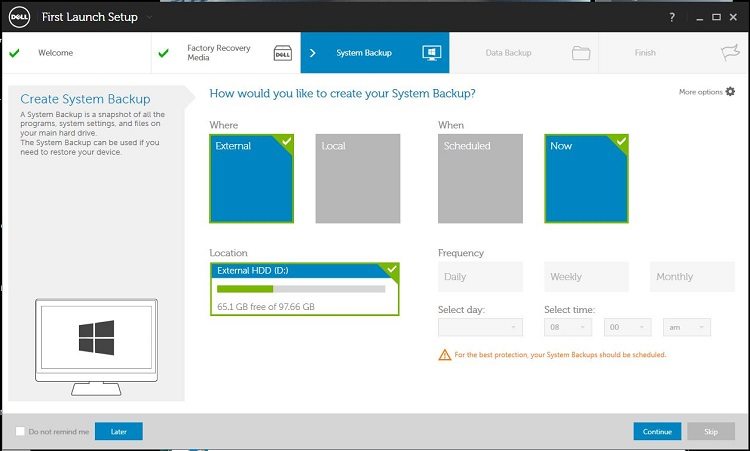
- On your Dell PC, press Win + C to call out Search Charm. Type Backup under Apps and select Dell Backup and Recovery.
- Read carefully about Dell Backup and Recovery End-User Opt-In Agreements and choose preferred options then click Next.
- Select Recovery Media tile and then the disk you inserted. Hit Start to burn the Win 10 recovery disk. When it finished, check OK and exit.
2.Download Essential Drivers to USB Flash Drive
Go to Dell Drivers and Downloads to download critical driver packages that enable you to access Dell Websites to complete the installation of rest hardware drivers after downgrading to Windows 7. These drivers must include:
- Intel Rapid Storage Technology Driver 14.5.x.x or higher
- Wireless or Local Area Network (LAN) driver
- NVMe Storage device driver
- USB 3.0 driver
After downloading these drivers, run the downloaded .exe file to extract other files and save them to the USB drive but not your Dell computer. The extracted files may be needed during the installation of Windows 7. Please do not perform driver installation after extracting.
3.Change Windows 10 System Boot Setting on Dell Computer
To ensure Windows 10 preinstalled downgrade to windows 7 with Dell, you need to change the boot settings from UEFI to legacy BIOS mode.
- Go to Settings on your Dell laptop or desktop and Change PC Settings > General > Advanced Startup > Restart Now.
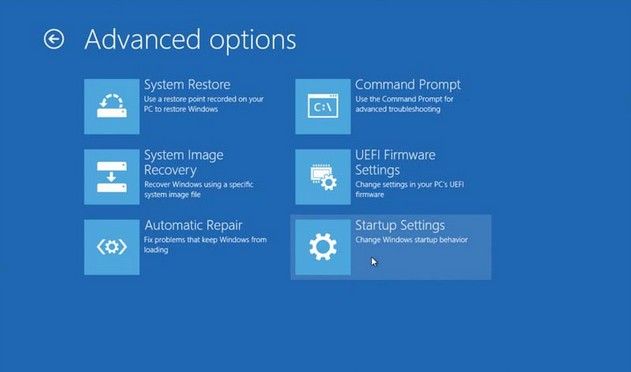
- When you enter Advanced options, select Troubleshoot > UEFI Firmware Settings > Restart, and Dell machine will restart and enter System Setup.
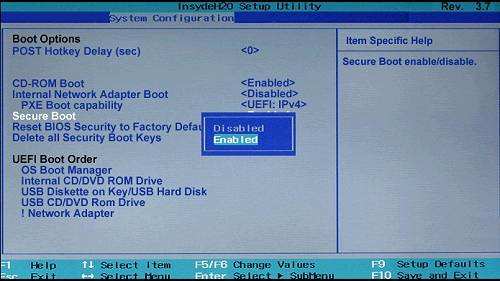
- Locate Secure Boot in the system setup and changed it from Enabled to Disabled. Save changes and exit.
4.Boot Dell PC from Windows 7 CD/DVD/USB Drive and Run the Installation Wizard
Now everything is ready. You can replace Windows 10 to Windows 7 for Dell following below steps:
- Insert the Windows 7 Pro DVD or USB media into your Dell computer and press F12 at Dell logo screen to boot from the media drive.
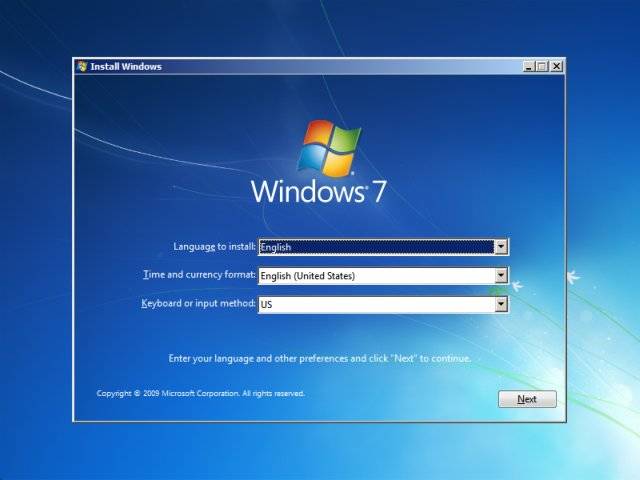
- Select the Language, Time, Currency and Keyboard Method settings after the Windows 7 installation loads. Then click Next to move on.
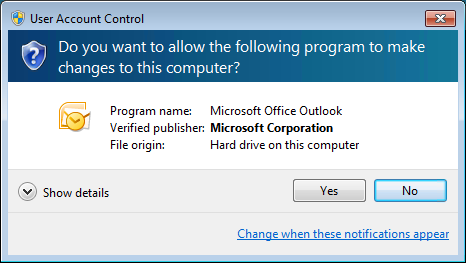
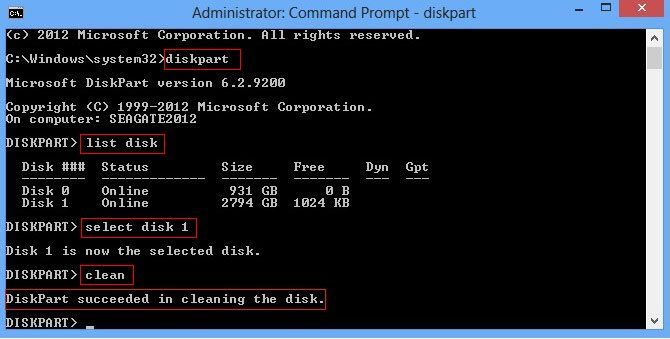
- Press Shift + F10 to open a command window. Type DISKPART and press Enter. Then you will receive a notification saying "Do you want to allow the following program to make changes to this computer?" Check Yes.
- Type List Disk command and press Enter to list all system disks. Carefully select Windows 10 installation drive based on the size and other information. If you are not sure which one to pick, please contact Dell Support or local tech helps.
- Type Select Disk # then press Enter key to execute. # represents the demonstrated drive number where you installed Windows on. After that, input Clean and press Enter again.
- Keep typing List Partition and press Enter to confirm Windows 10 partitions have been deleted. This is essential as Windows 7 cannot be installed on Windows 10 GPT partitions. After that type Exit and press Enter to quit diskpart and return to Windows 7 installation screen.
- On Windows 7 installation interface, choose Install Now then accept the terms and conditions, and follow the instructions to switch from Windows 10 to Windows 7 on a Dell PC.
- When you successfully entered Windows 7 desktop, using the extracted files created in step 2 to install l the Intel Rapid Storage Technology driver and the Wireless or LAN driver for your computer so that you can access the Internet and download the rest of drivers needed for your PC in Dell Drivers and Downloads.
That’s all about how to downgrade Dell computer from Windows 10 to Windows 7. Situations may happen that you cannot login in your Windows 7 computer after rollback, don’t hesitate to give Windows Password Key shot then.
Get Windows Password Key Now!
- Related Articles
- Top 2 Ways to Fix Windows 10 Can’t Login with Password after Upgrade
- An Easy Way to Downgrade Windows 10 to Windows 8.1
- How to Fix We Can't Sign into Your Account Error on Windows 10
comments powered by Disqus


