Top 4 Ways to Fix Enter Network Credentials Problems on Windows 10
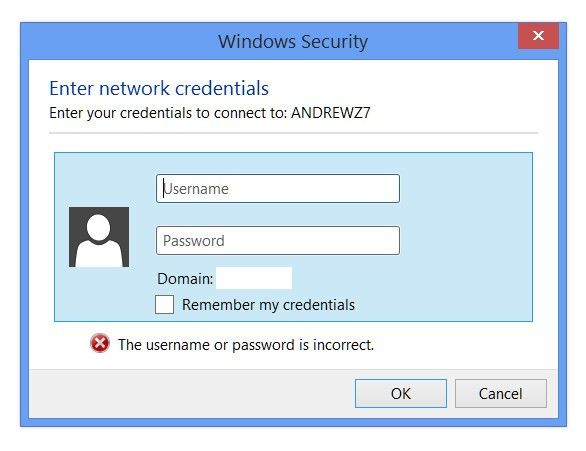
Windows Security will ask you to enter network credentials when access network drives to share files between computers or connect to remote desktop. This is because of Microsoft’s policy to protect Windows 10 computers, but we’ve heard from users that when they enter network credentials the username or password is incorrect, or saying the credentials used to connect server IP does not work. If you are in this case, don’t freak out. Here we will provide you with 4 ways available to fix Windows 10 keeps asking for network credentials.
Solution 1: Change Advanced Sharing Settings
The problem you can't enter network credentials on Windows 10 may result from the fact that some sharing settings are not enabled on your PC. So let’s do a simple check before taking further steps.
1. Type Network and Sharing Center in the search box to view your network information and connection settings.
2. Choose Change advanced sharing settings from the left side of the panel. Scroll down Private section to change sharing options.
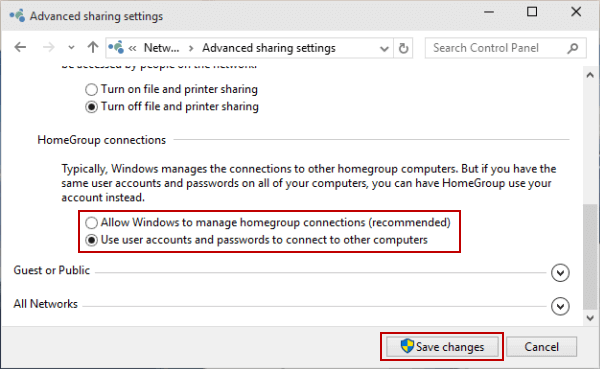
3. Locate HomeGroup connections to see if you have enabled the option to Allow Windows to Manage homegroup connections. If not, please kindly select it.
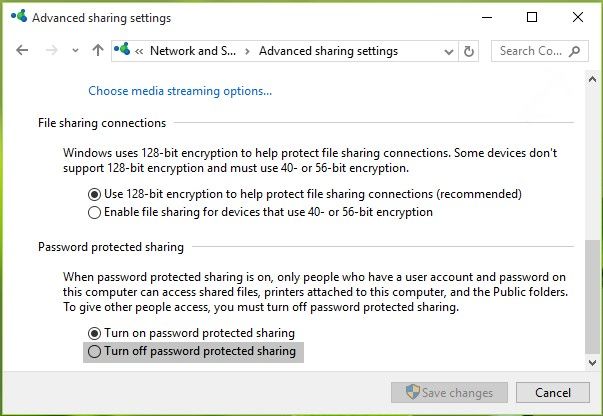
4. Now move to All Networks section and find Password protected sharing from the sub menu. Make sure you Turn off password protected sharing. Then click Save changes to execute what you have changed for network connection.
Solution 2: Add a Windows Credential in Credentials Manager
If you still have enter network credentials access error on Windows 10, you can manually add a credential of the computer you want to access. To do this:
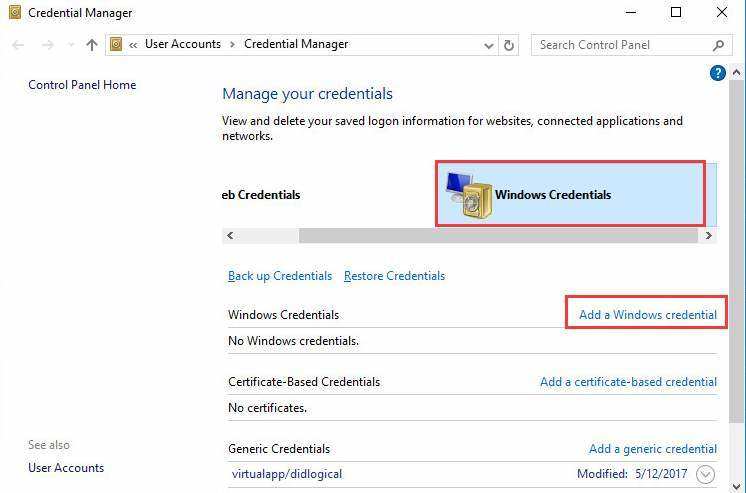
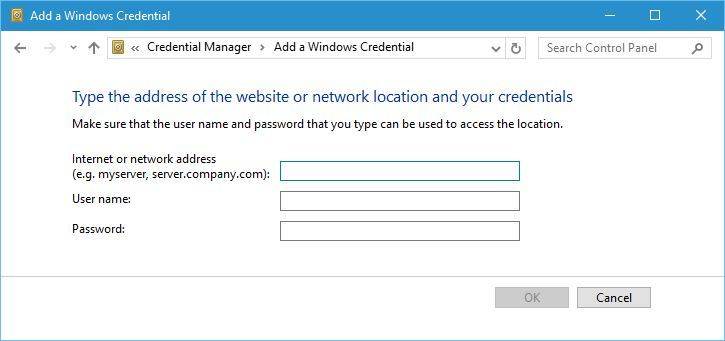
1. Type Manage Windows Credentials on search box and hit it to open Credential Manager. Make sure that Windows Credentials is highlighted on the interface and then choose Add a Windows credential below.
2. Enter to Server IP address you would like to access to. Fill in the User name and Password with the same as other computer’s local username and password.
Tip: Some Windows 10 users also replied that you can use Microsoft account username and password instead of local accounts when enter network credentials to connect to another PC. It sometimes doesn’t work, but there is no harm to try it. If you have your Windows 10 computer locked and forgot the password of either the Microsoft account or the local account, you are recommend to try the Windows Password Key to remove or reset your password.
How to Reset Windows 10/8/7 Password Easily
Solution 3: Check Whether the IP Address are Properly Assigned
If you have not set your computer IP address to static, it can works fine in a local network but sometimes may cause issues when the network server changes, such as Windows 10 network credentials access is denied, so you are suggested to use a fixed IP.
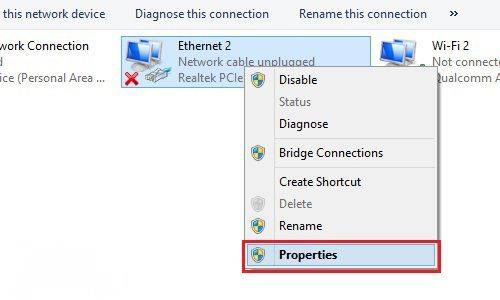
1. Press Windows + X at the same time and choose Network Connections. Right click network connect and choose select Properties.
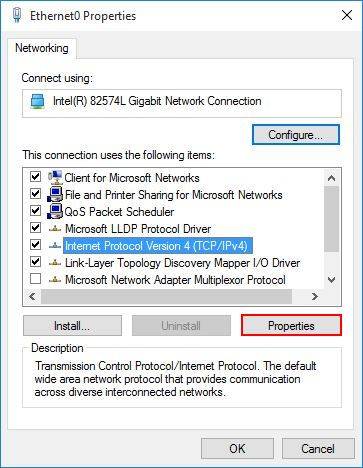
2. Make sure the Internet Protocol Version 4 (TCP/IPv4) is selected and then click Properties below.
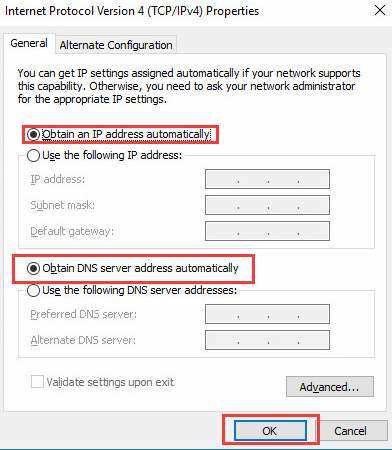
3. Choose Obtain an IP address automatically and Obtain DNS server address automatically both to get IP address assigned.
Solution 4: Modify Local Group Policy
One last choice to solve Windows 10 network credentials not working or Windows 10 doesn’t remember network credentials even if you have preserved the password is to edit the Local Group policy.
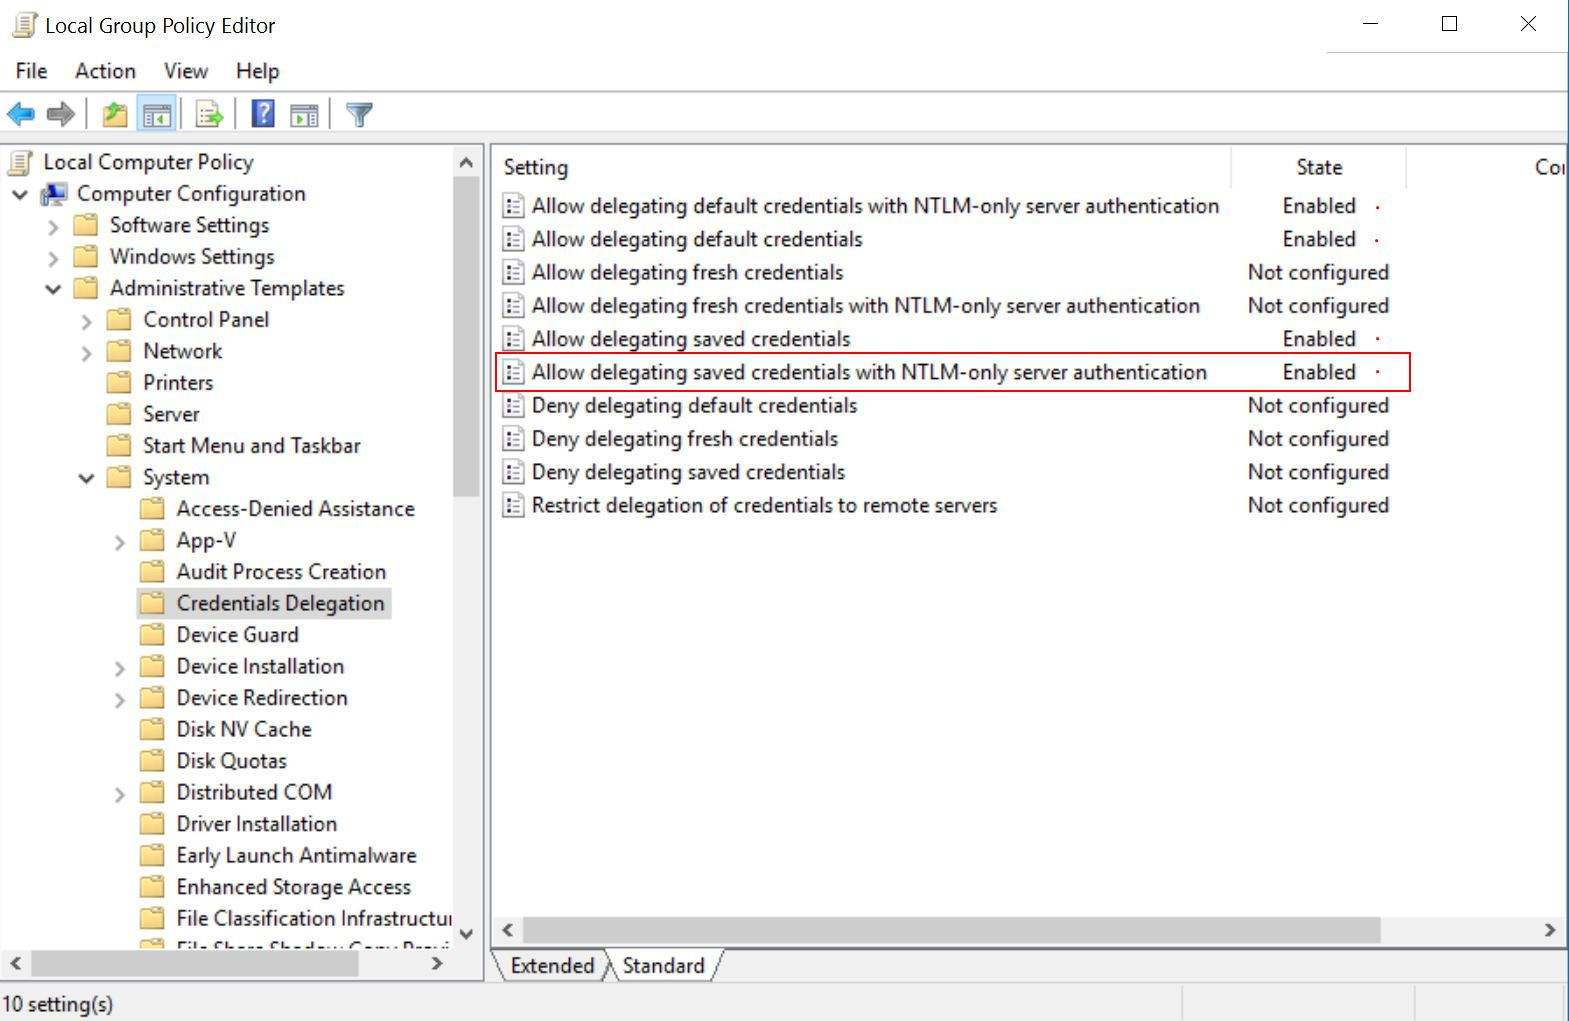
1. Press Win + R and enter gpedit.msc. Go to Computer Configuration > Administrative Templates > System > Credentials Delegation and choose Allow delegating saved credentials with NTLM-only server authentication.
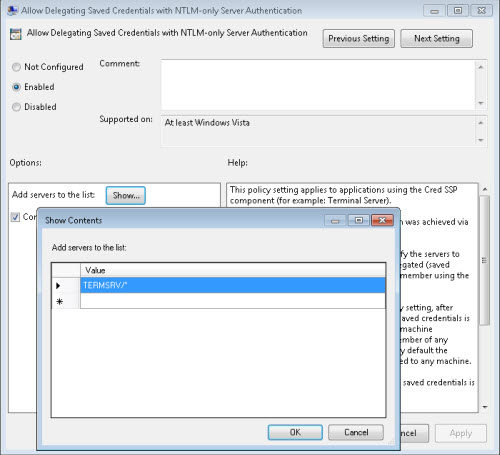
2. Click Enabled and Show and enter TERMSRV/*. Then exit Local Group Policy.
3. Now press Win + R again and enter gpupdate /force to force update policy.
That’s all about how to deal with enter network credentials not working when Windows 10 accessing network drive. You may need to try one or even more until this issue gets solved. Share with your friends or families with similar problems if this post is helpful.
Get Windows Password Key Now!
- Related Articles
- How to Fix We Can't Sign into Your Account Error on Windows 10
- Top 2 Ways to Fix Windows 10 Can’t Login with Password after Upgrade
- How to Reset Windows 10 PIN Password
comments powered by Disqus


