How to Fix Windows 10 Update Error 0x80240fff
Windows is the most popular operating system on planet earth. Annoyingly, users encounter issues when performing even the most mundane of tasks. One such issue is the Windows 10 update error 0x80240fff that occurs when trying to update to the latest release/ update. If you have experienced the same, worry not, this article explains detailed methods of fixing windows 10 error 0x80240fff.
Method 1: Deferring Updates
One simple way of fixing windows 10 update error code 0x80240fff, particularly for Windows Pro users, is by using the Defer Upgrades option which selects a different server from which you download the updates.
Part 1: Settings App
Step 1: Launch the settings via the Start menu.
Step 2: Click Update & Security > Advanced Options.
Step 3: Check the “Defer feature updates” option.
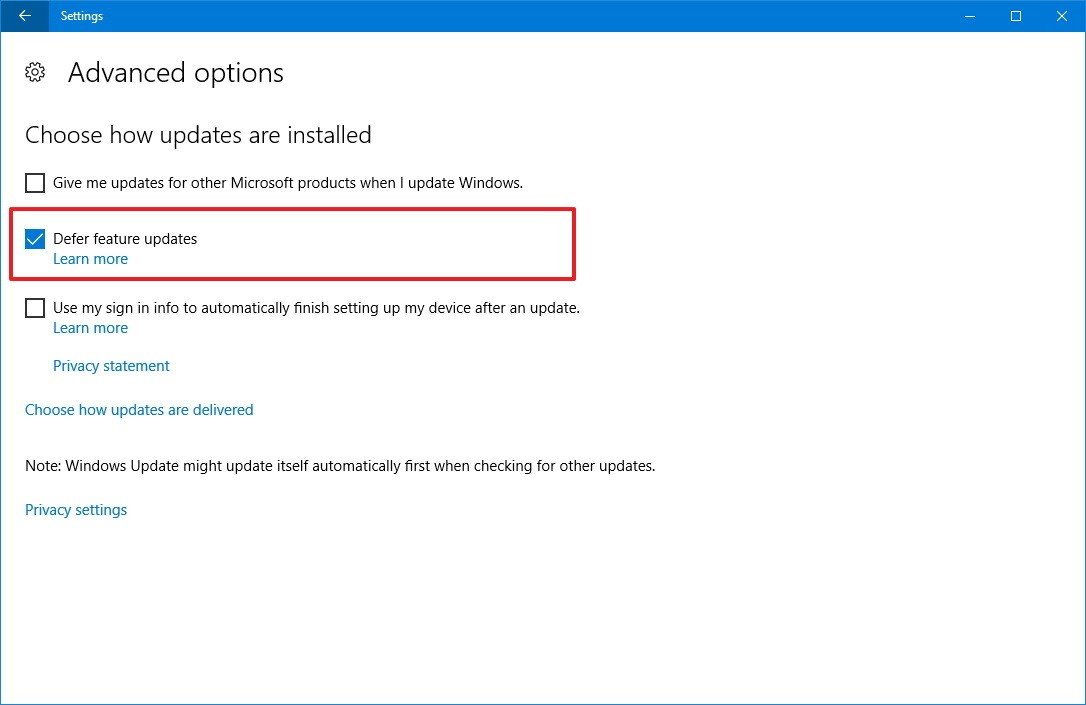
Step 4: To apply changes reboot your computer.
Part 2: Using Local Group Policy Editor
Step 1: Launch Local Group Policy Editor by searching it on Cortana Search bar.
Step 2: Navigate to “Administrative Templates” that falls under “Computer Configuration”. Click Windows Components > Windows Update.
Step 3: Find and click “Defer Upgrades and Updates” from the list of policies on the right-hand pane.
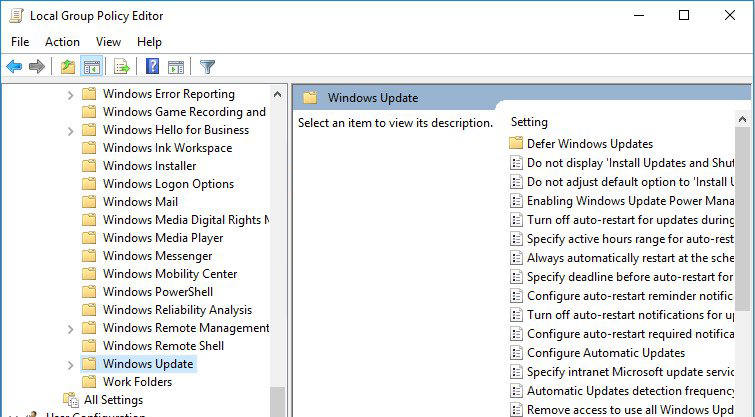
Step 4: Click “Enabled”. You can then defer monthly or weekly upgrades. For monthly, enter a number between 1 and 8 to defer upgrades in one-month increments.
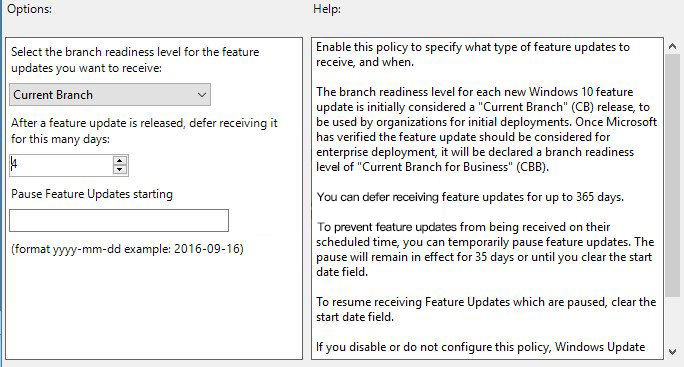
For weekly, do the same, but you can only enter a number between 1 and 4.
Method 2: Windows Media Creation Tool
Windows home users can fix Windows 10 wont update error 0x80240fff by using Windows Media Creation Tool.
Step 1: Download Window Media Creation Tool here, and run it as Admin.
Step 2: Accept the terms and click Upgrade this PC > Next.
Step 3: Installation of Windows 10 will begin once the download is complete.
Step 4: Select “Change what to keep” and click “Install “after closing all open files and apps.

Step 5: Wait for the installation to complete. Your PC may reboot several times.
Method 3: Windows Update Catalog
This is also a convenient method for Windows home users. It involves downloading and installing the updates manually using Windows Update Catalog.
Step 1: Visit: https://support.microsoft.com/en-us/help/4018124/windows-10-update-history and locate the latest update on the top of the list.
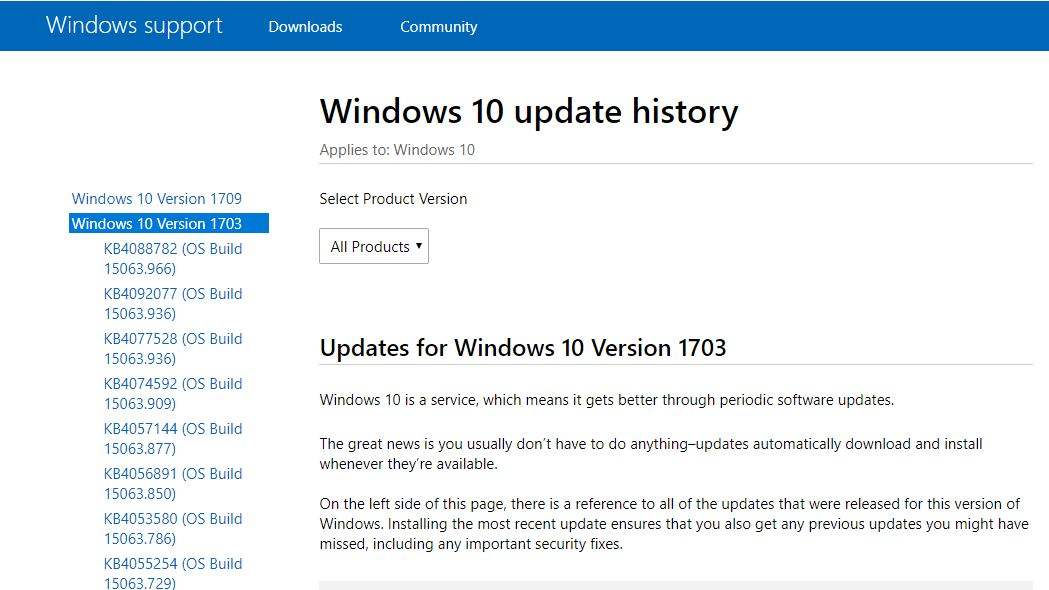
Step 2: Copy the KB number (including the letters), launch Microsoft Update Catalog and search it by pasting it in Microsoft Update Catalog search bar.
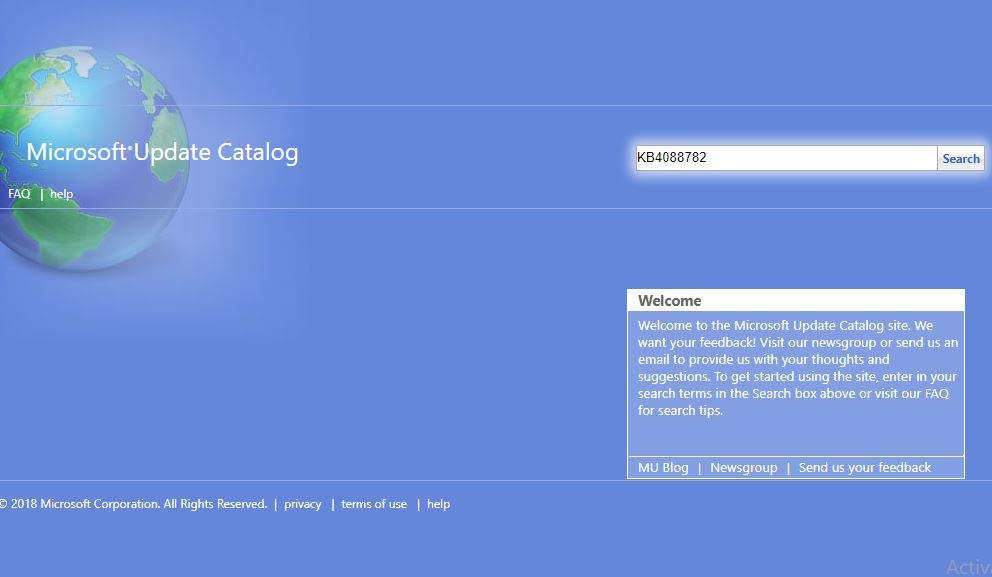
Step 3: Download the appropriate, 32 or 64-bit, upgrade and run it.
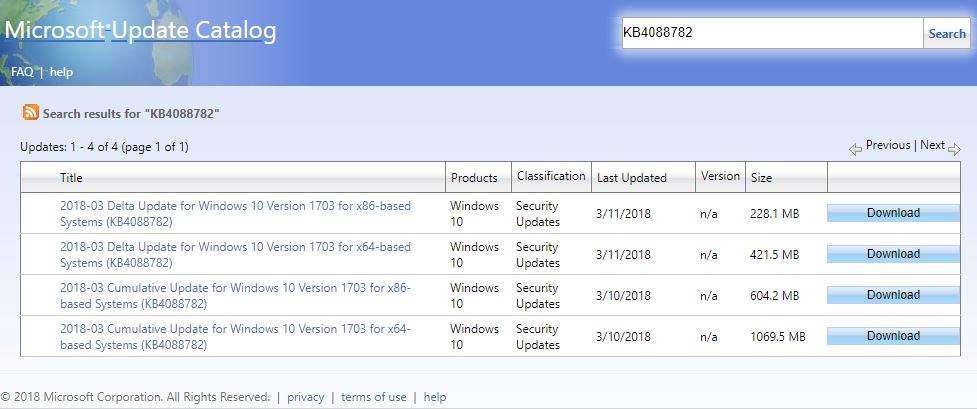
Step 4: Follow the prompts and reboot your PC.
Step 1: Launch the settings app.
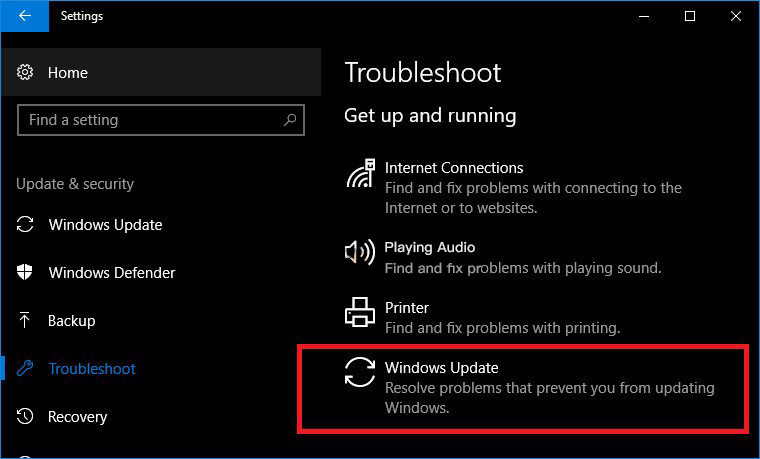
Step 2: Click Update & Security > Troubleshoot > Windows Update.
Step 3: Wait for the troubleshooting process to complete and click launch Internet Connections troubleshooter.
Method 5: Reset Windows Update Services
Step 1: Run command prompt as administrator.
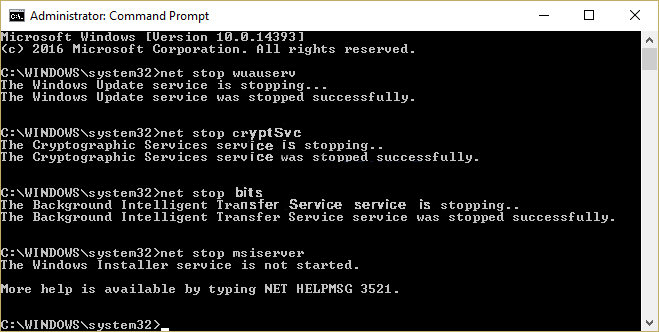
Step 2: End MSI Installer, Windows Update Services, BITS and Cryptographic by entering the following commands.
net stop msiserver
net stop wuauserv
net stop bits
net stop cryptSvc
Step 3: Rename Catroot2 and Software Disribution folders by entering the commands below.
ren C:\Windows\SoftwareDistribution SoftwareDistribution.old
ren C:\Windows\System32\catroot2 Catroot2.old
Step 4: Start all the services you killed in Step 2 by using start in place of stop as shown below.
net start wuauserv
net start cryptSvc
net start bits
net start msiserver
Step 5: Reboot your computer. All changes will be applied.
Conclusion
Error 0x80240fff repair utility can easily be fixed using the methods explained above. If you have lost of forgotten your Windows 10 login password, you can easily recover or reset it using Windows Password Key.
Get Windows Password Key Now!
- Related Articles
- How to Fix Windows 10 Upgrade Error Code 80240020
- How to Stop Error Code 0x8009002d on Windows 10
- Top 3 Free Ways to Fix Windows 10 Update Error
comments powered by Disqus


