Windows as the popular operating system around the world, easy to use and simplicity is one of the major reasons for its popularity. As we know, in technology, everything has some pros and cons. Windows also has. In the operating system like Windows, you will never know when you need a recovery disk or USB flash drive to restore the Windows system at a working state.
Basically, Windows recovery disk a tool that will restore your computer when it won't boots up. If your CD/DVD writer is not working then, you can use USB flash drive in order to fix the boot problem. Want to know how to create Windows 10 recovery disk or Windows 10 recovery USB flash drive? Well, follow this useful post.
How to Create Windows 10 Recovery Disk/USB Flash Drive without Software
Want to create Windows 10 recovery disk/USB flash drive without using windows 10 recovery tool? In this part, you will find a guide on how you can create recovery disk/USB flash drive without using any software.
How to create a Windows 10 recovery disk on Windows 10?
Step 1: At the very first step, you have to click on the "Start menu" and open Control Panel.
Step 2: Now, you have to click on the "System and Security" > Hit on "Restore your computer to an earlier time. If you didn't find "Restore your computer to an earlier time", simply search "recovery" on the search field.
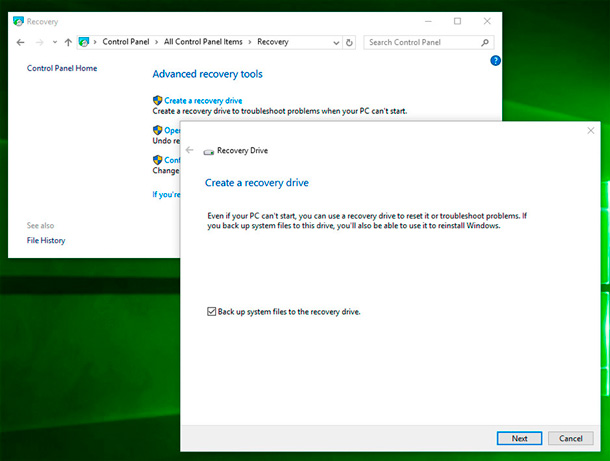
Step 3: After that, click on the "Advanced recovery tools". On the Advanced recovery tools, click on "Create a recovery drive".
Step 4: A new Recovery Drive Window will appear, insert the CD/DVD in the writer and tick the "Back up system files to the recovery drive" and click on the "Next" button.
Step 5: Select the location where you would like to save the system recovery.
How to create a Windows 10 USB recovery drive on Windows 10?
Step 1: First, go to the control panel and click on the "System and Security" and search for recovery.
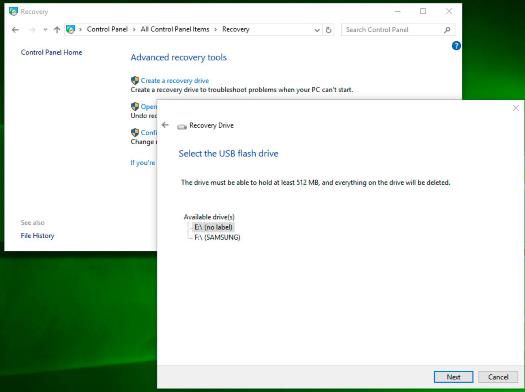
Step 2: Now, click on the "Create a recovery drive" and plug the USB flash drive to the computer.
Step 3: Choose the location where you want to save the system recovery.
Step 4: Once you select the location, click on the "Next" button.
Bonus Tips: How to Create Bootable Bootable Win 10 Password Recovery Disk
Creating Windows 10 password recovery disk is a bit complicated process especially if you are a layman, so i'm gonna to introduce one best windows password recovery tool which named PassFab 4WinKey. By using it, you can create a bootable Windows password reset disk with CD/DVD, or USB flash drive, you can also easily reset or remove the password of your Windows account, Microsoft account, Administrator account, delete or create Windows account and much more.
Step 1: Initially, download the PassFab 4WinKey and install it to your PC/Mac.
Step 2: After installation, you have to double-click on its icon to launch the PassFab 4WinKey.
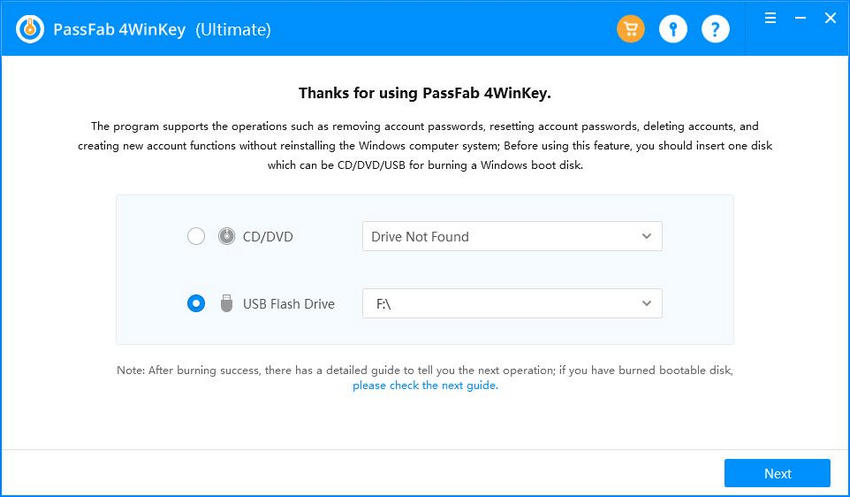
Step 3: Now, you have to choose the drive that you would like to create a Windows 10 recovery drive. To choose the drive, simply click on their radio button and hit on the "Burn" button.
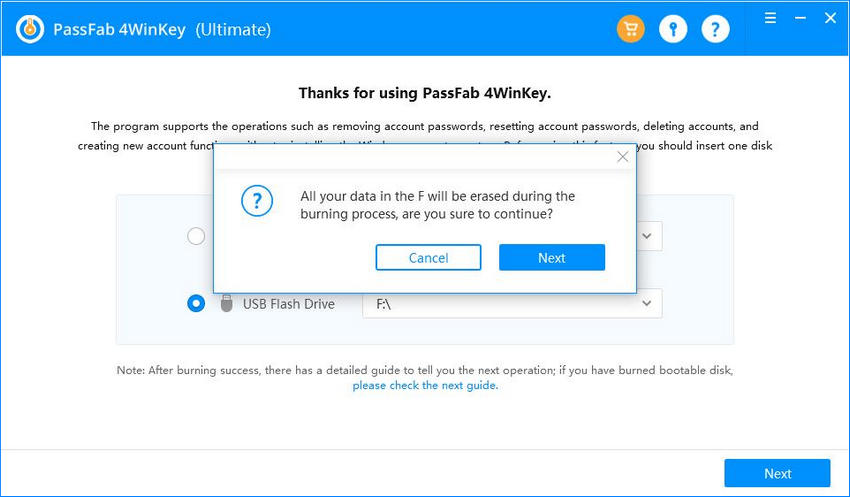
Step 4: Warning message will pop up on the screen, click on the "Yes" button to grant.
Step 5: You have to wait for a couple of minutes. Once the burning process completed, you will see burning successfully message on the screen.
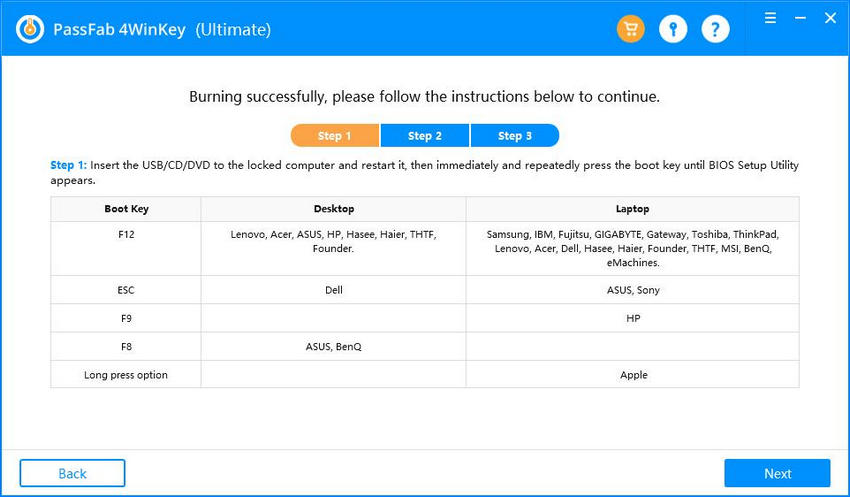
Now, you can use the recovery disk in order to boot your computer.
Summary
In this artile, we have talked about how to create a Windows 10 recovery disk step by step. After analyzing the above post, we find PassFab 4WinKey is ultimate Windows 10 password recovery tool. You can easily create a Windows password recovery disk in a few easy steps, unlike other tools. Moreover, PassFab 4WinKey is not limited to create a bootable Windows password reset disk, you can also try this if you forget or want to bypass Windows password.