How to Remove Password from Excel 2013
Excel 2013 has a password protect feature that allows you to protect your workbooks and your worksheets with passwords. Most people prefer to remove password from Excel documents since they are likely to forget or misplace it. Forgetting or misplacing one’s password can be frustrating and can result in unnecessary inconveniences, and that’s why most people would rather remove passwords from their documents than fail to access their documents on time. Users can also remove passwords to avoid the hassle of sharing the password with other collaborators of the file. In this article, we are going to talk about how to remove password from Excel 2013 with several different methods.
There are actually 5 types of password in Excel 2013, which are:
- Open Password
Users are prompted to key in the password each time the file is opened. - Modify Password
Users can view the document but have to enter a password to modify its contents. - Read Only password
The password places the workbook in read-only mode and makes the workbook to open only in read-only mode. The document cannot be altered unless it is saved in another file location. - Workbook structure password
This type of password prevents other users from viewing hidden worksheets and altering generally the structure of your Excel workbook. - Sheet password
Sheet password protects a particular worksheet preventing users from editing the contents of that worksheet.
Part 1. Remove Open Password from Excel 2013 When Password is Known
Thinking about how to remove a password from Excel 2013 when the password is known? Users can do so by using the Protect Workbook feature as detailed in the procedure below.
Option 1. How to Remove Password to Open in Excel 2013
- Step 1: Navigate to the location of the Excel file and open the workbook.
- Step 2: Click the File tab locate in the ribbon then select Info.
- Step 3: Click the dropdown arrow next to the Protect Workbook option.
- Step 4: Click Encrypt with password option.
- Step 5: A pop-up window will be displayed. Clear the dots in the password section and click Ok.
- Step 6: Hit Ctrl + S simultaneously to save the document.
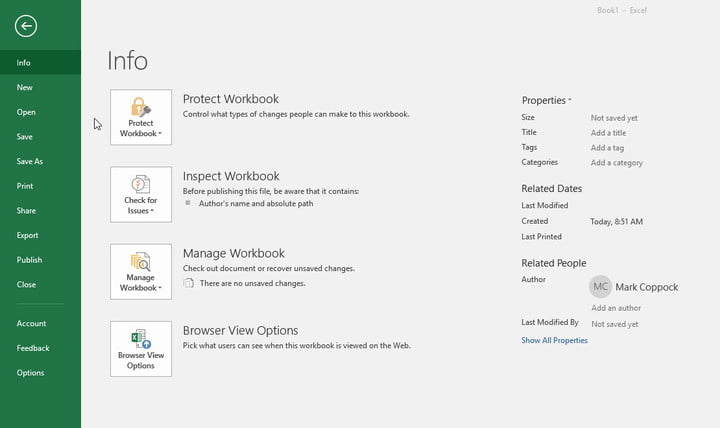
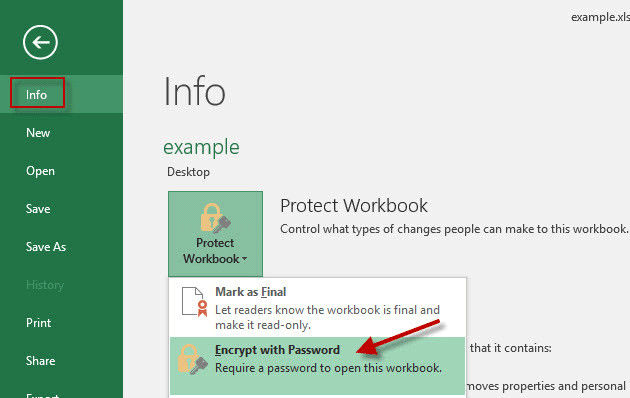
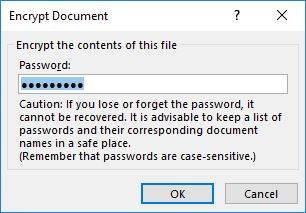
You will not be prompted to enter a password when you open the file.
Option 2. How to Remove Password to Modify in Excel 2013
The Modify Password prevents users from editing the contents of the workbook albeit they can view the documents.
- Step 1: Navigate to the location of the Excel file and open the workbook.
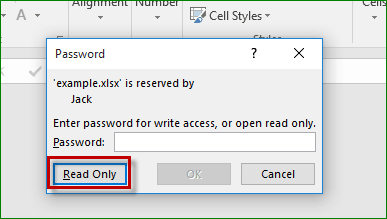
- Step 2: A Password dialog box will pop-up. Click the Read Only button. (Don’t type the password in the password field.)
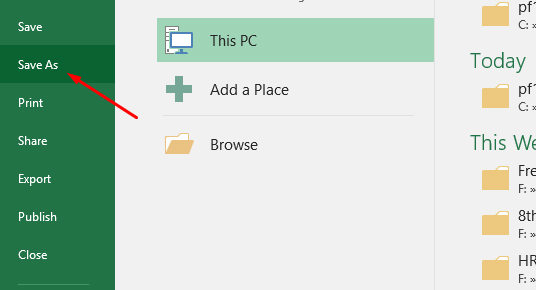
- Step 3: Click the File Tab located in the ribbon, then click Save As and select a different file location on your hard drive.
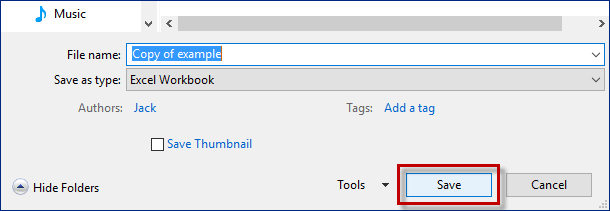
- Step 4: Save the file by clicking Save. This is a good workaround of modifying a modify password protected Excel file.
- Step 1: Navigate to the Excel file in question, select a worksheet at the bottom of the interface right-click it and click Unprotect Sheet.
- Step 2: Enter the password in the Unprotect Sheet Password dialog box and click Ok: it is the same password you used to protect your worksheet.
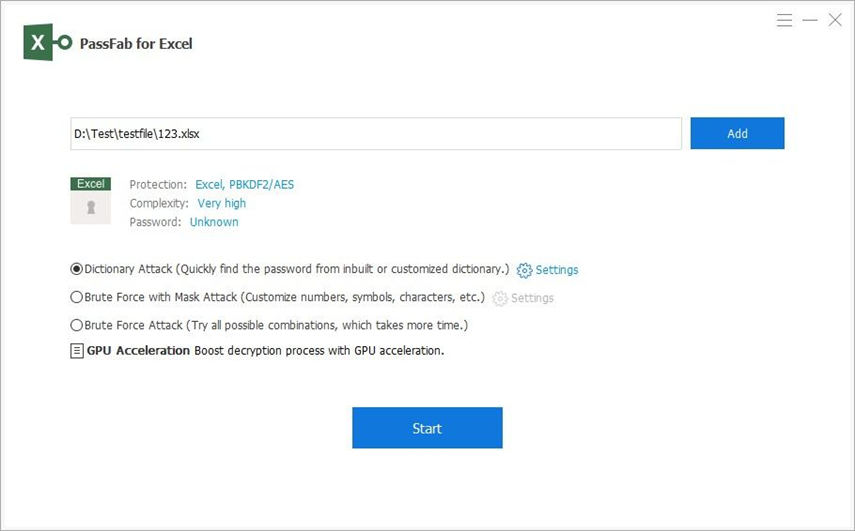
- Step 1: Download, install and run the free trial version of PassFab Excel Password Recovery on your PC.
- Step 2: Click Add button on the main interface.
- Step 3: Navigate to the location of the file you wish to remove the password and add it. Choose one of the password attack types, and then click Start button and the password will be removed.
Option 3. How to Remove Workbook Structure Password in Excel 2013
To remove the workbook structure password, follow the procedure in Option 1 and 2 above.
Option 4. How to Remove Sheet Password in Excel 2013
To edit a particular worksheet that has been password protected, remove the password by following the procedure below.
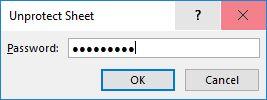
Alternatively, in the ribbon, click Review and then Unprotect Sheet. Enter the unprotect sheet password in the dialog box that appears.
Part 2. Remove Excel 2013 Password When Password is Unknown
Want to remove password from Excel 2013? Look no further than PassFab Excel Password Recovery. It is a great tool that allows users to remove and recover passwords on Windows 10/8.1/8/7/Vista/XP, Windows Server 2012 (R2)/2008 (R2)/2003 (R2) and MS Excel 2016/2013/2010/2007/2003/97. It utilizes multi-core CPU and GPU acceleration.
In addition to that, it employs three powerful attack options: brute force with mask attack, dictionary attack, and brute force attack in the recovery of passwords. Better still, PassFab Excel Password Recovery allows users to remove and recover passwords both online and on their computers. It supports decryption of multilingual Excel files at swift speeds regardless of length of passwords and complexity all the while guaranteeing 100% decryption for both spreadsheets and workbooks.

Summary
This article details 5 methods users can use to remove Excel 2013 password. We recommend using PassFab Toolkit since it is a simple and straight-forward process. Furthermore, PassFab Excel Password Recovery allows users to remove password from Excel 2013 online. With it users are guaranteed of 100% document decryption; both workbooks and spreadsheets can be decrypted. It also supports decryption of Excel files in different languages. Users can also use it to recover forgotten passwords. It allows users to recover and remove passwords by using multi-core CPU and GPU acceleration. Download it and try it out.
Product-related questions? Speak directly to our Support Team >>
