2 Ways to Change Account Type of Users in Windows 10
Windows has applied different user account type to ensure the system security.In Windows 10, there only 2 account type: Administrator and Standard. An administrator account is a user account that lets you make changes that will affect other users. Such as change security settings, install software and hardware, and access all files on the computer. A standard user account lets a person use most of the capabilities of the computer, but can’t make changes that affect other users or the security of the computer.
Sometimes you may want to change a standard user account to an administrator account to have full the privileges and rights? Or change an admin account to a standard user account to limits the permissions and privileges. In this article, we will show you how to change account type in Windows 10.
You may also interest in How to Change a User’s Account Type in Windows 8.1 and 8.
Solution 1: Change Account Type in Windows 10 Control Panel
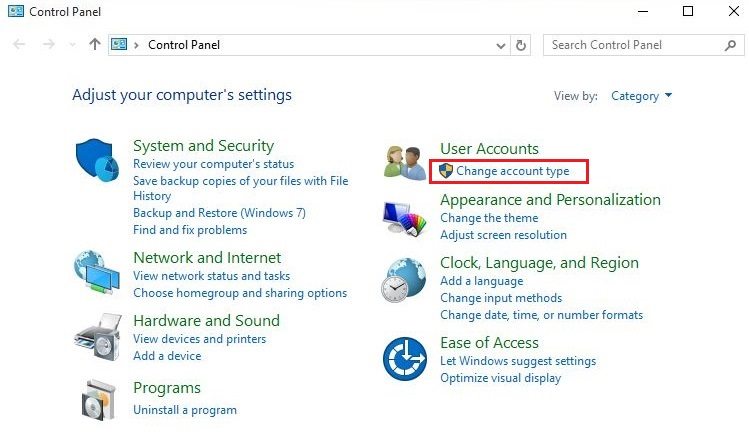
Step 1: Right click the Win icon and choose “Control Panel”, click “Change account type” under “User Account”. Then all the users in your computer will be list out.
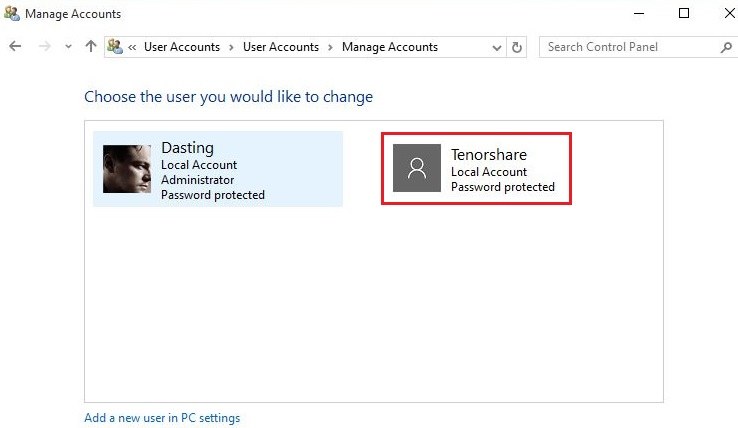
Step 2: Choose the one you need to change account type.
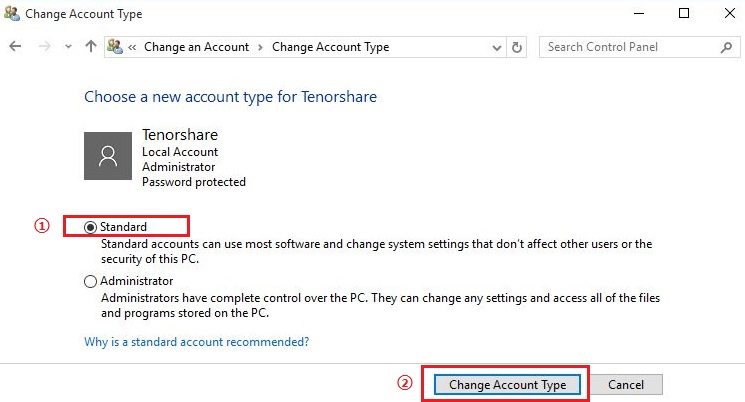
Step 3: Click “Change the account type”.

Step 4: Choose another new account type then click “Change Account Type”.
Solution 2: Change Account Type in Windows 10 Settings App
Step 1: Click Win icon and choose “Settings”, then click “Accounts”.
Step 2: Choose “Family & other users” in left pane, scroll down and you will see all the users account in your system. Click “Change account type” under any account.
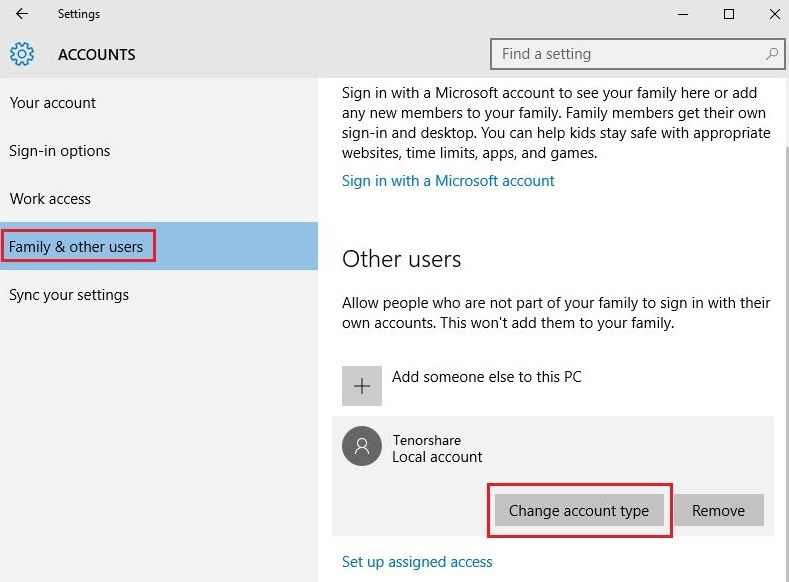
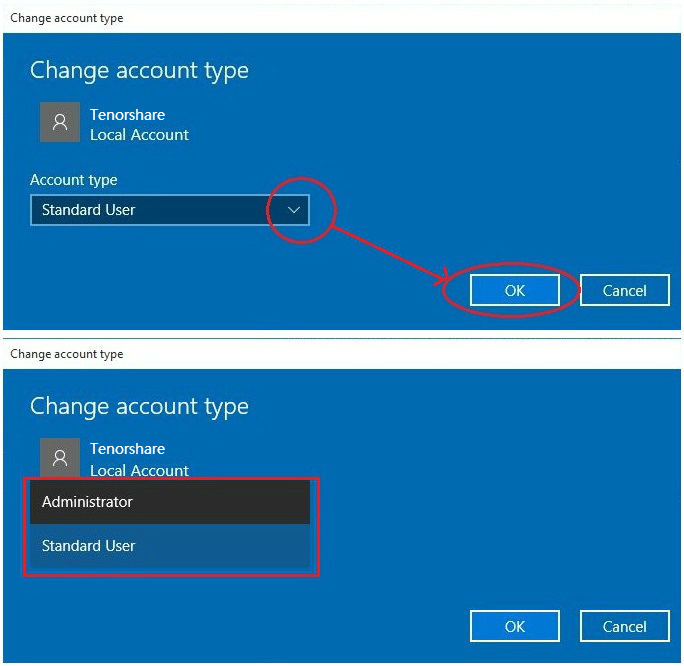
Step 3: In popup window, choose the target account type you want to change then click OK to confirm. You will successfully change the account type in Windows 10.
Everything done! Just take it easy for a Standard user to do vital changes to your computer. For other information of Windows 10, such as how to reset Windows 10 PIN password, you can read about the article resource.
- Related Articles
- How to Reset Windows 10 Password When It Is Forgotten
- How to Reset Password Windows 7 with USB
- How to Reset Administrator Password in Windows 8.1
comments powered by Disqus
