The Easiest Way to Create a Bootable Windows PE USB Drive
"How do I create a WinPE bootable USB for Windows 7?"
How can I create Windows PE bootable USB to recover data or repair the system?"
A Windows PE bootable USB can be a useful tool that provides minimal set of operating system features for installation, troubleshooting and recovery. In this post I am going to explain how you can create a WinPE bootable USB drive in an easy way.
Detailed Steps to Create a WinPE USB Drive
You may think it is a little troublesome to make a bootable WinPE drive, especially when you have limited technical skills or professional knowledge. In fact, it is can be pretty simple and convenient when you choose the right tool. Lucky you, Windows Password Recovery can be the best choice. To get started, you can download the software and follow the tutorial below to see how smart it is.
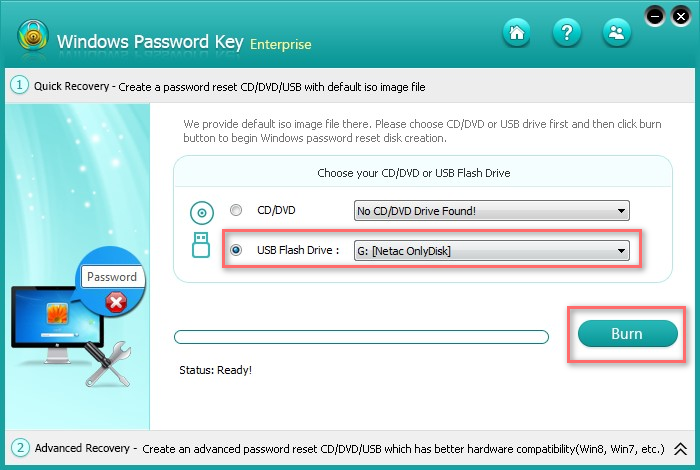
- Step 1: Launch the program. On the main interface, select "USB Flash Drive" and specify the USB flash drive burning drive from the pull-down list.
Note: The USB flash drive needs to be formatted and all the data on it will lose. If there is important data on it, please make a backup firstly.
- Step 2: Inset a USB drive, and then click "Burn" button to start the burning process. if your computer can't read the default ISO image, directly go to step 3 to make a new ISO image and burn a bootable USB flash drive.
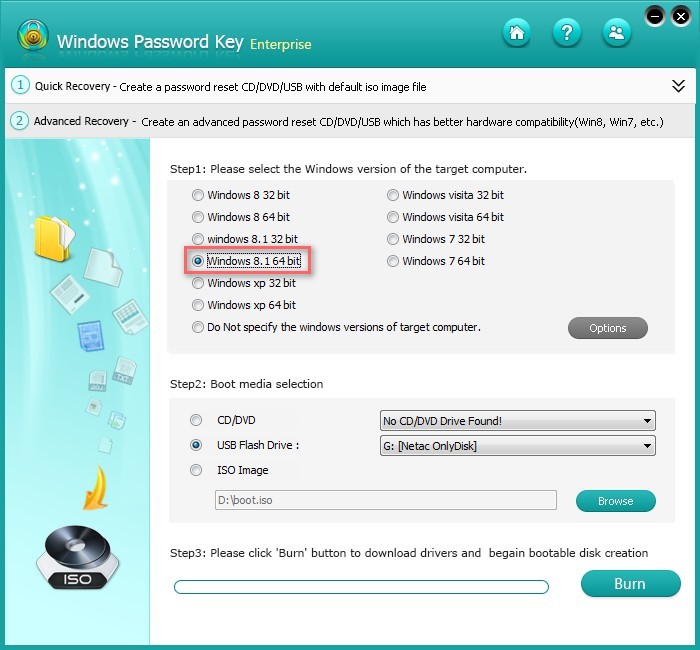
- Step 3: You can also select "Advanced Recovery" and then select the Windows version of your computer.

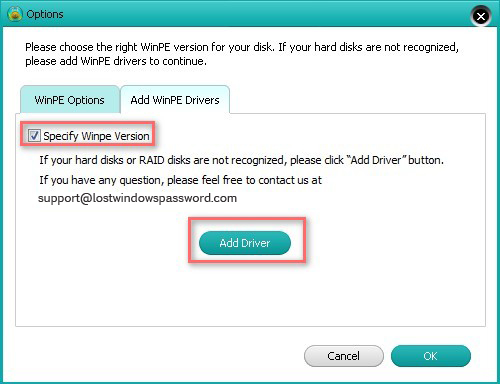
Note: Please choose the right WinPE version for your disk. If your hard disks are not recognized, please click "Add WinPE Drivers" to continue. Do as the step 2 shows to start to burn the USB flash drive.
To boot your computer from the Windows PE USB flash drive, you need to enter the computer's BIOS, change the boot settings under Boot Menu, and set the BIOS to boot from USB flash drive. This can be pretty helpful when you forget your Windows password.
- Related Articles
- how to recover lost password on windows 10
- how to reset password window 7 with usb
- how to reset administrator password in windows 8.1
comments powered by Disqus