
August 25, 2016 02:23 pm / Posted by Michael Eric to Windows Tips
Follow @MichaelEric
Some users are not used to setting login passwords on personal computer for the sake of convenience. However, sometimes you may come across the situation that other people borrow your PC and you don't want your personal data in some documents and folders to leak out.
Right, Windows lacks the kind of file- or folder-oriented protections. However, we sort out two practical ways to lock folders with password in Windows 7. Follow the steps in this tutorial to make sure that your personal files are secured from others.
There are no official solutions in Windows to put a password on folder. If you don't want to spend money on third party tool, here I recommend you two tricks to create protected folders.
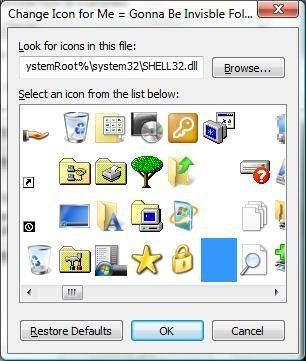
#Create an Invisible Folder
Right click on the folder >> click on "properties" >> click on "customize" >>click on "change icon">> choose a blank space. Now the icon is invisible.
If you want to hide the words either, go to "properties">> click "rename box" >> hold ALT and press "0160" in the box, then the name of the folders would go secret too.
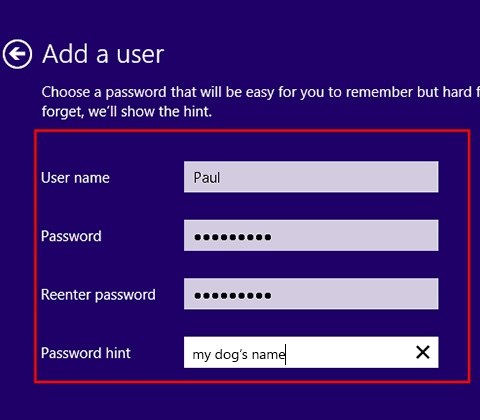
#Create an User Account for Other Visitors
If you have the administrator privilege then it is the easiest way to protect your personal folders. Just create a Guest account to allow other people to access your PC with limited rights and protect the domain account with password.
But note that you need to remember your domain account password to avoid locking out. Also the disadvantage is that you need to create multiple accounts to meet others' need. You are advised to use Windows Password Recovery to get back lost Windows passwords.
#Make Password for Folders Using Batch File
Step1. Firstly you need to create a folder that will store your password protected folder >>Open it and create a new Text Document in Notepad inside.
Step2. Open the document and paste the following code in it >> Change the red part of the code PASSWORD_GOES_HERE to the password you want to set >> Save the file as locker.bat.
Step3. Once the file is saved as batch file then you can cancel the original text file >> Double click the batch file and it will automatically create a folder named Private, where you can store some secret info >> Run locker.bat. again, confirm that you want to lock the folder by pressing "Y" and "Enter". The next time you open the file, it would ask you to type in passwords.
cls
@ECHO OFF
title Folder Private
if EXIST "HTG Locker" goto UNLOCK
if NOT EXIST Private goto MDLOCKER
:CONFIRM
echo Are you sure you want to lock the folder(Y/N)
set/p "cho=>"
if %cho%==Y goto LOCK
if %cho%==y goto LOCK
if %cho%==n goto END
if %cho%==N goto END
echo Invalid choice.
goto CONFIRM
:LOCK
ren Private "HTG Locker"
attrib +h +s "HTG Locker"
echo Folder locked
goto End
:UNLOCK
echo Enter password to unlock folder
set/p "pass=>"
if NOT %pass%== PASSWORD_GOES_HERE goto FAIL
attrib -h -s "HTG Locker"
ren "HTG Locker" Private
echo Folder Unlocked successfully
goto End
:FAIL
echo Invalid password
goto end
:MDLOCKER
md Private
echo Private created successfully
goto End
:End
Here are three ways for you to password protect Window 10/8/7/XP folders. If you have more fascinating tips, please do not hesitate to share it with us in the comment section below. Thank you and have a nice day!
Download SmartKey Access Password Recovery:
$19.95
Efficiently help you get back lost or forgotten MS Access (.mdb) file password.


Recover all your Word, Excel, ppt, accesss office files password
Copyright©2007-2020 SmartKey Password Recovery. All rights Reserved.
 Follow us on Twitter