Change the Default Font in Word 2013/2010/2007/2003

How to Change the Default Font in Word 2013/2010/2007/2003

Aug. 12, 2014 10:12 am / Posted by Michael Eric to Office Tricks
Follow @MichaelEric

"How do I change the default font in Word 2013?"

For your own reasons, you would like to change the default font in your Word. In fact, the steps can be simple and clear. Just check in the following part. Figure out your Word version and choose the corresponding solution.

Change the Default Font in Word 2013/2010

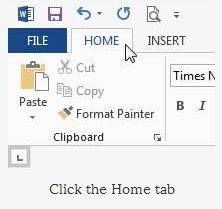
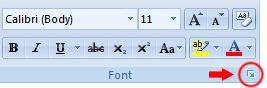
  • Step 1. Open Microsoft Word 2013. Click on the Home tab.

    ow to change the default font in word 2013
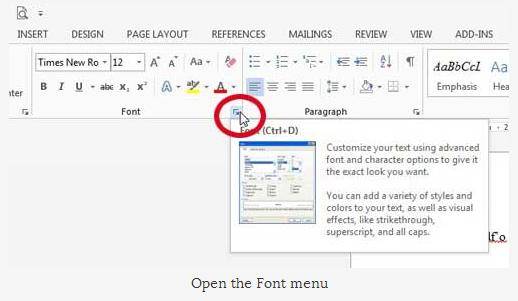
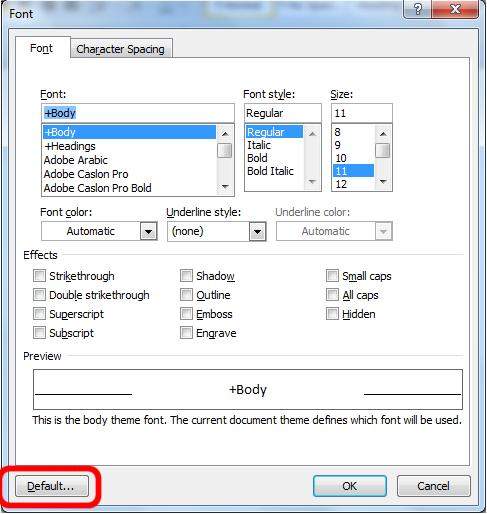
  • Step 2. Click on the Font dialog box button as shown in the screenshot below, and select the Font tab.

    change font's default style in word
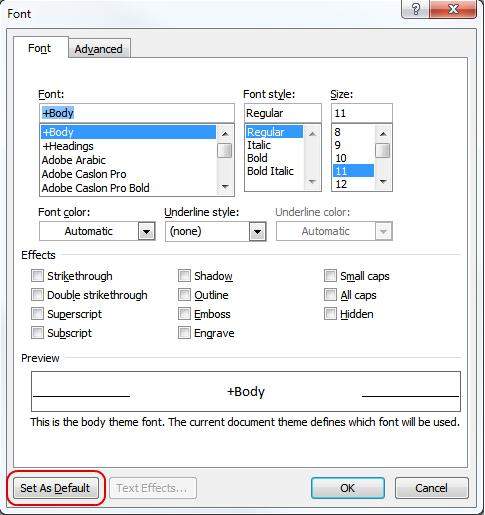
  • Step 3. Choose your preferred font, style size and color from the assorted sections of the window, then click the Set As Default button at the bottom – left corner of the window.

    change font's default style in word
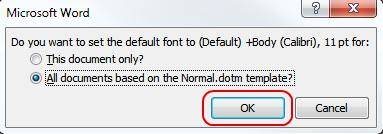
  • Step 4. Select All documents based on the Normal.dotm template? and click OK to update the default for all new documents.

    how to change the default font in word 2013

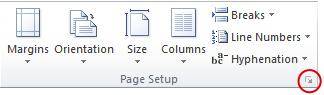
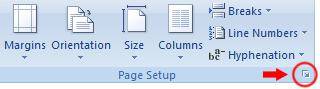
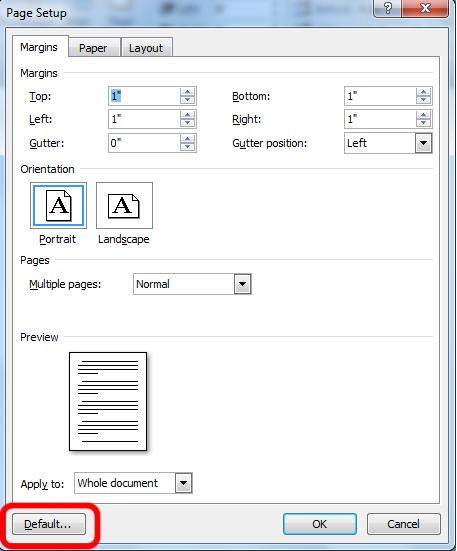
More, you can change Word 2013's default page margins.

  • A. Click on the Page Layout tab and click on the Page Setup Dialog box button as shown in the screenshot below.

    change font's default style in word
  • B. Set the new margins that you would like to make the default and click Set As Default.

    how to change the default font in word 2013
  • C. Click Yes to apply the changes.

Change the Default Font in Word 2007

  • Step 1. Open a new document, click on the Home tab, click on the Font Dialog Box Launcher and select the Font tab.

    change font's default style in word
  • Step 2. Select a new font and size in the Font dialog box, and then click Default.

    change default font in word 2007
  • Step 3. Click Yes to confirm the change.

Here, you can change the default page margins in Word 2007.

  • A. Click the Page Setup Dialog Box launcher.

    change default font in word 2007
  • B. The first tab should be Margins. Make your changes to the margins here, and then click Default.

    change font's default style in word
  • C. Click Yes to get confirmed for the change.

Change and Set the Default Font in Word 2003

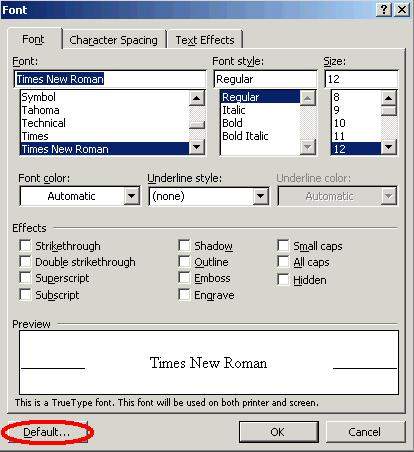
  • Step 1. Open a new document and select Format > Font.
  • Step 2. Select the preferred font and size in the box, and click Default.

    set the default font in word 2003
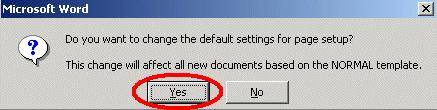
  • Step 3. In the next window, click Yes to make the changes permanent.

    change font's default style in word

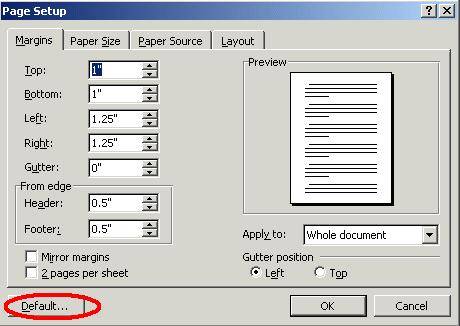
Here, you can change the default page margins in Word 2003.

To change Word's default page margins, select File > Page Setup. The first tab should be Margins, make your changes to the margins here, and then click Default.

set the default font in word 2003

Tips: Know the detailed instruction on how to password protect MS Word 2003 document here.

Download SmartKey Word Password Recovery:

Free Trial Buy Now

Only $19.95

Secure Download
30 Days Money Back Guarantee
comments powered by Disqus

NEXT TOPICS
Office Password & Key

Recover all your Word, Excel, ppt, accesss office files password


Connect with SmartKey

Copyright©2007-2020 SmartKey Password Recovery. All rights Reserved.