Enable or Disable HomeGroup Feature in Windows 7

How to Enable or Disable HomeGroup Feature in Windows 7

May. 15, 2014 09:54 am / Posted by Michael Eric to Windows Tips
Follow @MichaelEric

What is HomeGroup in Windows 7?

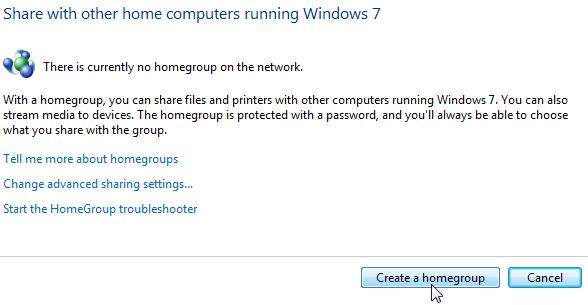
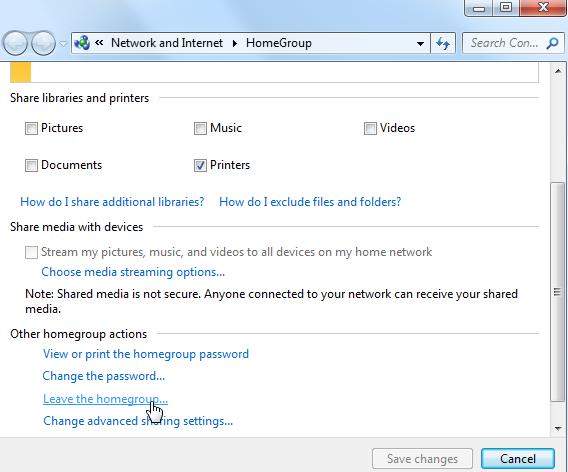
A homegroup makes it easier to share files and printers on a home network. You can share pictures, music, video, documents, and printers with other people in your homegroup. Other people can't change the files that you share, unless you give them permission to do so. Now, you can easily connect two or more PCs running Windows 7 on your home network to automatically start sharing printers - and your media and document libraries - with other people in your home.

Note that HomeGroup is only available on home networks.

How to Enable HomeGroup Feature in Windows 7?

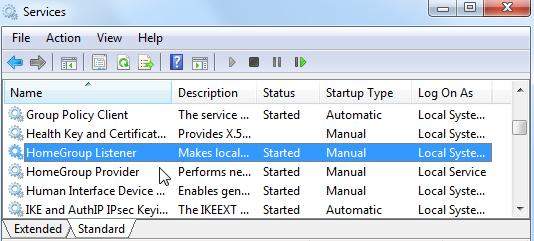
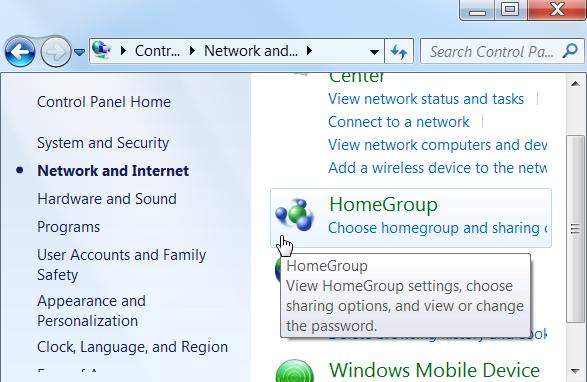
How do I enable Windows 7 HomeGroup feature to share files on different computers? For this question, it's not so that difficult. First, you need to enable the service. Keep trying the following steps:

  • 1. Open up sevice.msc in the Start menu search box, or just find it through Control Panel. Find HomeGroup Listener in the list, and set it to automatic.

    how do I enable windows 7 homegroup feature
  • 2. Head into Control Panel -> Network and Internet, and then click on HomeGroup.

    enable homegroup in windows 7
  • 3. Simply click on the Create a homeGroup button, and follow the prompts. If you don't spot the words Create a homeGroup, your HomeGroup is already set up on this PC; choose Change HomeGroup Settings instead. If your see a Join Now button instead, a HomeGroup has been created on another PC in your network.

    enable homegroup in windows 7
  • 4. Select what items to share on your HomeGroup. You can select from Pictures, Music, Video, Documents, and Printers.

    Note: You can process the password to use a password to add other computers to your homegroup. Click here to learn how to choose a secure yet easy-to-remember password.

Thus you have finished how to enable HomeGroup in Windows 7.

How to Disable HomeGroup Feature in Windows 7?

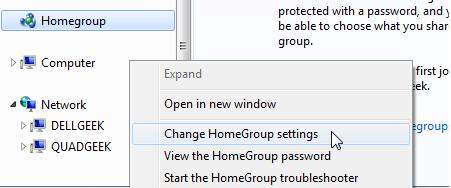
However, if you are concerned about the privacy, you can set the file to be "Read-only" so that others have no access to it freely. Or if you want to disable Windows 7 HomeGroup for other reasons, you can finish it too. Just read the following steps.

  • 1. Open up Windows Explorer, right-click on the HomeGroup option in the left-hand pane, and then choose Change HomeGroup settings.

    how to disable homegroup feature in windows 7
  • 2. Click an option called Leave the homegroup, click it at the bottom of the window.

    how to disable homegroup feature in windows 7
  • 3. Now you'll be presented with a wizard asking you to confirm that you really want to leave the homegroup. Make sure you want it.

    So far, you have disabled HomeGroup feature in Windows 7, but you haven't removed it. Keep reading to learn how to remove HomeGroup in Windows 7.
  • 4. Open up sevice.msc in the Start meny search box, or just find it through Control Panel. Find HomeGroup Listener in the list, double click it.

    how to remove homegroup from windows 7
  • 5. Change the Satrtup type to Disabled, and click the Stop button to stop the service. Once you're done with that, you'll need to disable the HomeGroup Provider service in the same way.

    how to remove homegroup from windows 7
  • 6. Then HomeGroup is gone from the navigation pane.

When you need to enable or disable HomeGroup feature in Windows 7, remember to refer to this post. So keep it in a firm place. In additional, if you forgot your Windows 7 login password, turn to Windows Password Recovery for help, which can reset the forgotten Windows password with great ease.

Download SmartKey Windows Password Recovery Ultimate:

Free Trial Buy Now

Only $44.95

Secure Download
30 Days Money Back Guarantee
comments powered by Disqus

Copyright©2007-2020 SmartKey Password Recovery. All rights Reserved.