HomeGroup is a feature of Microsoft Windows introduced with Windows 7 and later. After you enable your Windows 7 HomeGroup feature, you can freely share the files and folders with each other. Actually, this article provides top three options for you to change Windows 7 HomeGroup sharing file and folder settings in the same networking.
Option 1: Allow or Prevent Sharing Libraries or Printers
This allows you to allow or prevent an entire library or printer from being shared with the HomeGroup with Read only access unless the level of access is changed in the other options below. This option is the same one that you initially set when you created or joined a HomeGroup.
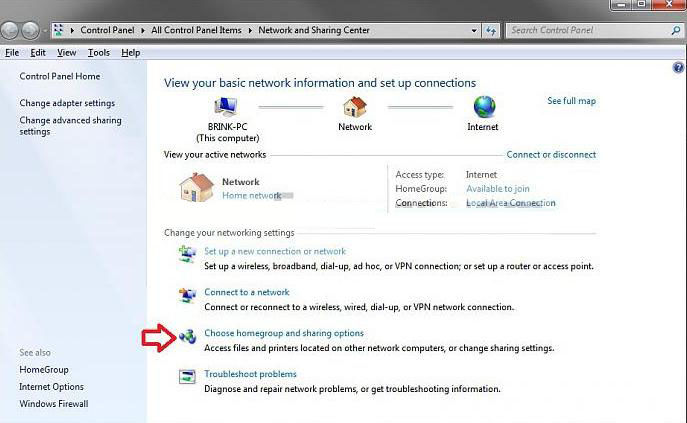
1. Open the Control Panel, and click on the Network and Sharing Center icon.
2. In the Network and Sharing Center, click on the Choose homegroup and sharing options link.
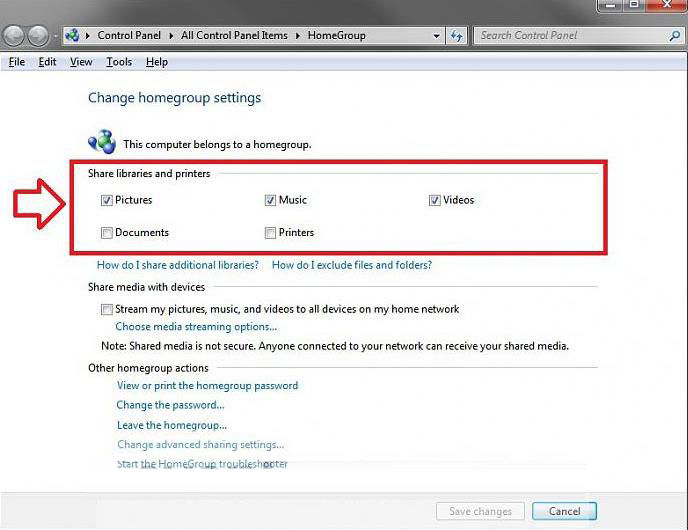
3. Check (to allow) or uncheck (to prevent) what libraries and printers that you want to share from your user account on your computer with everyone on any other computer that joins this homegroup, then click on Save Changes.
OR
1. Open Windows Explorer, then right click on Homegroup in the navigation pane and click on Change HomeGroup settings.
2. Go back to the step 3 above.
Option 2: Allow or Prevent Sharing User Files and Folders in Libraries
This will show you different ways on how to set specific files and folders from your personal user folders that are included by default in a library to either have a Read only or Read/Write sharing level of access for everyone who joins the HomeGroup, or to Remove from the HomeGroup and not be shared at all.
1. Open Libraries from within a Windows Explorer window.
2. Select one or more Library folders, or files or folders in a library that you want to remove or change the level of access for sharing with the HomegGroup.
If you need to change the setting of public folders included in the libraries, you will need to use the next option below for these folders and files instead.
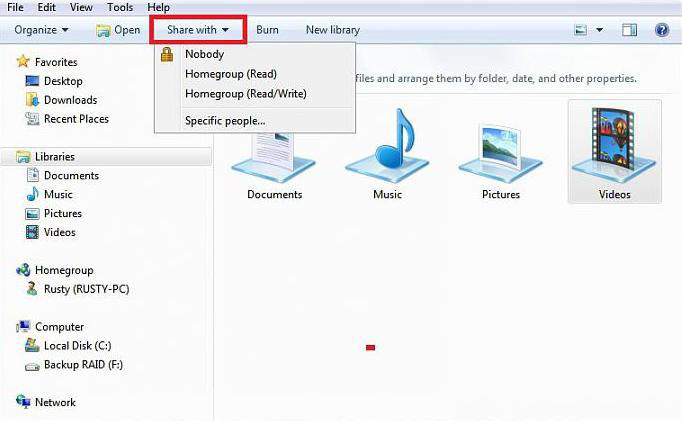
A. You can choose from the Toolbar
Click on the Share with toolbar button, and select what level of access you want to have for it.
B. You can choose from the navigation pane
Right click on the Library folder, or a folder in a library, then click on Share with and select what level of access you want to have for it.
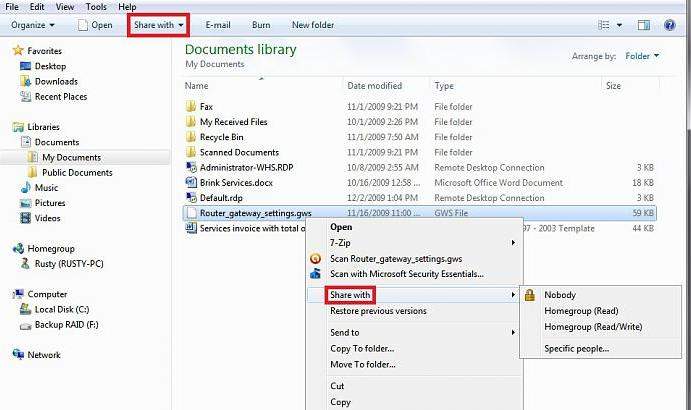
C. You can choose from a File or Folder in a Library
Right click on the selected single or more than one file and folder, then click on Share with and select what level of access you want to have for it.
D. You can choose from a Library
Right click on the selected library or libraries, then click on Share with and select what level of access you want to have for it.
Option 3: Allow or Prevent Sharing Public Files and Folders in Libraries
This will allow or prevent sharing all of your computer's public folders included in libraries with everyone that joined the HomeGroup. You can't select to allow or prevent specific public folders, or files and folders in these public folders though.
1. First you need to select Change advanced sharing settings. Here are three ways for you to achieve it.
A. Open the Control Panel, and click on the HomeGroup icon and select Change advanced sharing settings.
B. Open the Control Panel, and click on the Network and Sharing Center icon and click on the Change advanced sharing settings link.
C. Right click on a Public folder or file from any of the same locations in Option two above, then click on Share with and Advanced sharing settings.
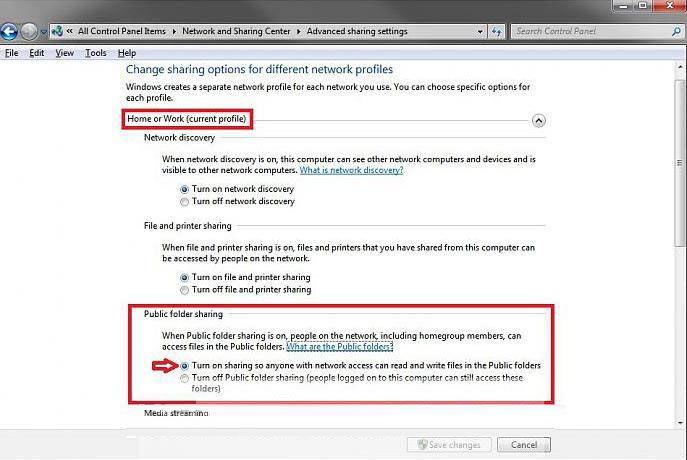
2. Under the Home or Work settings, go to the Public folder sharing section.
3. Select to Turn on sharing so anyone with network access can read and write files in the Public folders, and click on Save changes. Or you can select to Turn off Public folder sharing..., then click on Save changes.
Choose the suitable option for how to change HomeGroup file and folder sharing settings in Windows 7. Remember to make good use of your HomeGroup feature in Windows 7. In addition, if you set a HomeGroup password and forgot it unfortunately, click here to know how to get back the forgotten HomeGroup password for Windows 7.
Download SmartKey Windows Password Recovery Ultimate:


 Follow us on Twitter