File History is a new feature in all versions of Windows 8.1 and 8 to back up your data. It knows how to store multiple versions of your files so that you can totally trust this feature. First see what does File History Back up:
File History has a predefined set of items that it backs up automatically: all your libraries (both default libraries and custom libraries you created), the Desktop, your Contacts, Internet Explorer favorites and the OneDrive (SkyDrive).
Then, move on to how to set up, turn on and back up data with File History in Windows 8.1.
How to Back up Data with File History in Windows 8.1?
First, you need to set up File History since this feature is turned off by default in Windows 8.1 and 8. Here you can get two options to set up it and backup the files with File History.
1. Set up File History and Back Up Files from PC Settings
A. Make sure that the network location or drive that you want to save your file history to is connected.
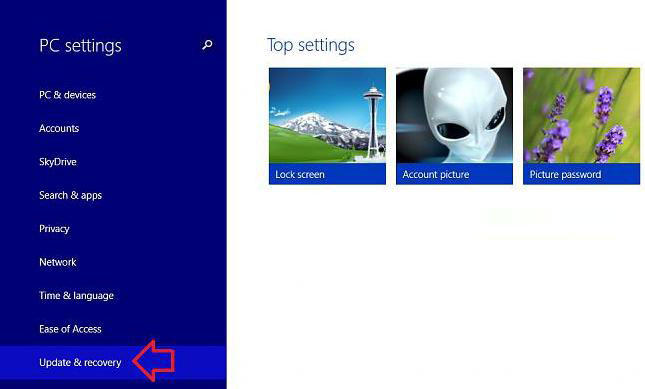
B. Open PC settings, and click or tap on Update & recovery on the left side.
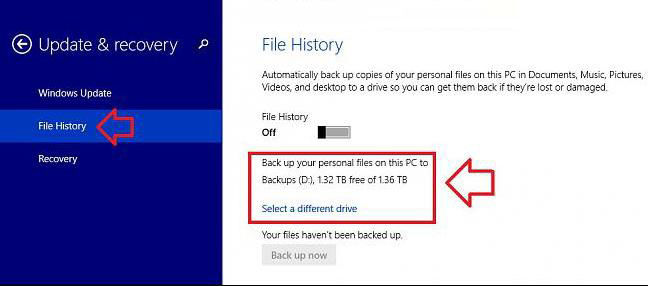
C. Click or tap on File History on the left side of Update & recovery.
D. To select a network or local drive location to save file history to:
a). If the drive you want to use is already selected to be used by default, then directly go to turn on and back up data with File History in Windows 8.1.
b). Click or tap on Select a different drive. See the screenshot above in Step C.
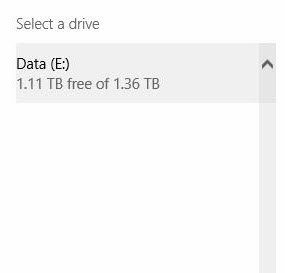
c). Click or tap on the drive you want to save File History on.
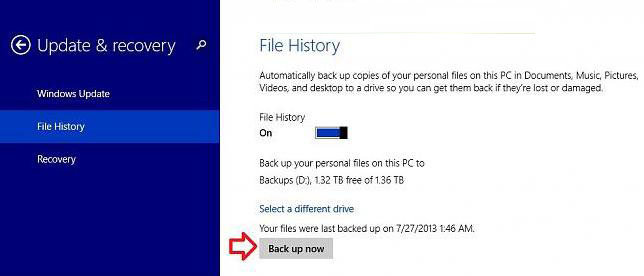
E. Turn on File History and Back up Data with It.
a). Under File History, move the slider to the right to turn on and use File History.
F. Now the File History is backing up a copy of your files.
G. When the backup is finished, you can click or tap on Back up now to manually back up a copy of your files at anytime.
H. When finished, you can close PC settings if you like.
2. Set up File History and Back up Files from Control Panel
A. Make sure that the network location or drive that you want to save your file history to is connected.
B. Open the Control Panel, and click or tap on the File History icon.
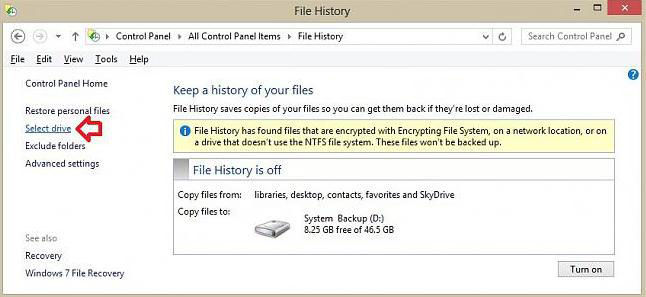
C. To select a network or local drive location to save file history to:
a). If the drive you want to use is already selected to be used by default, then directly go to turn on and back up data with File History in Windows 8.1.
b). On the left side in File History, click or tap on Select drive.
c). Either select a drive or add a network location, and click or tap on OK.
d). If prompted, click or tap on Yes to use the selected drive again for File History if it has been previously used before.
e). If prompted, click or tap on Yes or No to move any files previously copied using File History at other locations to the new selected drive.
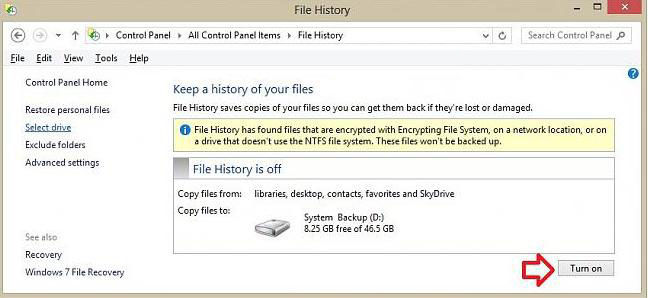
D. In File History, click or tap on Turn On to use File History.
E. Then, File History is backing up your files that are in your libraries, contacts, Internet Explorer favorites, Microsoft OneDrive, and your desktop.
Thus, you have successfully backed up your files with File History. Then you can refresh or reset your Windows 8.1 computer with no concern.
Download SmartKey Windows Password Recovery Standard:


 Follow us on Twitter